Hello there. Just sharing my page for Scrap the Boys - this month we have a sketch challenge.
Here's what I've come up with:
I've kept to a very neutral palette - letting the photo 'stand out'.
For the circle element in the sketch, I've simply drawn some lines with a black pen.
I've added in some texture with stencils and also fussy cutting some leaves from pattern papers.
Here are some close-up's:
A cluster - die-cut heart with word from Heidi Swapp - fussy cut leaves - arrow and heart stickers by Heidi Swapp.
family sticker by Heidi Swapp.
This is the last challenge for 2015 - it's been a great year of creating and we've had awesome challenges. There have been so many amazing entries!!
Check the blog for more inspiration for this challenge and to see the great prizes up for grabs.
Thanks for coming by ♥
Tuesday, 15 December 2015
Thursday, 10 December 2015
bow and arrow - your creative wings.
Hello all!! I was delighted to see this bow and arrow set in my pack of chipboard from Your Creative Wings! My son has a bow and arrow so I knew it wouldn't take me long to create a page with this fun set.
The chipboard has some lovely details on it, which you won't want to cover up with any mediums, so I've left it raw.
I've also used some of the Mesh Panel as a feature for behind the photo and pattern papers.
Mesh Panel
Bow and arrow
Til next time, happy creating!
The chipboard has some lovely details on it, which you won't want to cover up with any mediums, so I've left it raw.
I've also used some of the Mesh Panel as a feature for behind the photo and pattern papers.
I have enough left-over to create another page!
Mesh Panel
Bow and arrow
Til next time, happy creating!
Tuesday, 8 December 2015
crochet blanket project
Hello there! In my last blog post, I left off with No 4 crochet blanket - the Skinny Ripple. Since then I've been distracted and started another blanket.
I'm sharing this completed blanket today - a Solid Granny Square blanket/throw with a Pom-Pom border.
I just love how it's turned out! It's only a small blanket, more suitable for a pram or decorative item in a little girls room ☺
The squares are made up of Solid Granny Squares - I've used 50/50 Acrylic Cotton yarn in 8ply which crochets up so nicely.
I've joined each square with a row of single crochet, which also creates a ridge pattern between each square.
And I've finished it off with a cute pom-pom crochet border which is probably my favourite part ♥
I'll be going back to the Skinny Ripple blanket now, so I can get that one complete. But I think I'll be planning my next Solid Granny Square blanket very soon .....
Thanks for popping in ♥
Monday, 7 December 2015
today - Your Creative Wings
Hello there, another share using some fabulous chipboard from Your Creative Wings.
Today I'm using the Square Charm Set - I'm using some of the assorted squares in different sizes and also the larger pieces.
I love giving the chipboard colour, especially to match in with the bright photo! I've gone with red, blue and white!
Each piece has been hand painted with the different colours. On the white, I've added some glitter paint to give it some sparkle.
I still have quite a few of the different sized squares left-over, so I'll be sure to use them on another page soon ☺
Square Charm Set
Til next time, happy crafting!
Monday, 23 November 2015
beautiful busselton - your creative wings
Hello there!
Today I have a scrapbook page to share which uses some pieces from Your Creative Wings Chipboard.
I love to scrapbook and record recent pictures, as the moments are always fresh in your mind. The other week, my youngest son and I took a walk along the beach near the iconic Busselton Jetty - I'm always amazed by our beautiful beaches!
I've used the Ornate Frame and the chipboard word Beautiful.
Here are some close-up's:
For the title I've given it some colour with water colour paints. I firstly do a base coat of white, so it's neutral - then I've painted on the blue, concentrating on different areas to give different shades of blue.
I finish it off with a coat of crystal glitter by DecoArt - it gives a nice shimmer in real life.
To make this frame a feature on the page, I've added in a photo - I've done the same water colour process for this piece of chipboard too. But I've also added in some micro beads in blue and silver.
Pop over to the online shop to view these chipboard pieces and many more .....
YCW6020 - Ornate Frame
YCW1012- Beautiful
Monday, 16 November 2015
young wild and free - your creative wings
Hey there, another page to inspire you! Your Creative Wings chipboard is a great addition to any scrapbook page. I've done a little mixed media style today, but still keeping it simple.
My title: Young Wild and Free was the perfect piece for this photo as my little boy was having a wonderful through some trees near a river.
I have also used the Mesh Panel piece, cutting into it so I could have some behind the photo and also to the side. And I still have some left-over!
I've given the chipboard pieces a light coat of white water colour paint and then painted on a few coats of DecoArt crystal glitter sealer. This gives it a slight shimmer which is lovely 'in real life'.
These two pieces are available in store now so please take a look online ☺
Thanks for coming by ☺
Friday, 13 November 2015
gorgeous girl - jot mood board
Hello to you all ☺
I couldn't resist playing along with the Jot Mood Board for November - it's so pretty and girly ☺
Here's what I've come up with:
I love this photo of my gorgeous niece and it suited the challenge well.
I've used a pretty stencil from American Crafts with a floral texture - adding in water colour paint in the pink and yellow.
The papers are by Heidi Swapp.
I received a lovely prize pack from 2 Crafty Chipboard and have used one of the pieces in this page.
Here are some close-up's:
For the chipboard, I've first painted in white using some India Ink and then brushed over with Silks Acrylic Glaze in Sunburst. It's given it a lovely shimmery finish.
I just LOVE the effect of the stencil with texture paste. I found some micro beads in my stash and added some of these near the roses in the stencil work.
I have some Heidi Swapp frames and have made some faux flair .
Pink is such a pretty, girly colour and the pops of yellow make it a happy page.
Thanks for coming by ♥
Saturday, 7 November 2015
crochet blanket project
Hello again, I thought I would share the progress on my crochet blanket project. I've completed three blankets and am now onto my fourth.
The last blog post I was working on the shell stitch blanket - this has come up all lovely and girly. I always love the effect of wide stripes.
...... and I always love admiring, finished blankets ♥
So now I'm onto the fourth. I've gone with very boyish colours this time and have chosen the pattern - skinny ripple - a great tutorial is on the blog from Little Woollie.
It's two rows of single crochet in a ripple pattern. And I'm randomly changing the colours - this project involves using yarn from my stash, so some colours may be a bit limited ☺
It's also worked into the back loop only, so you are left with lovely texture in your blanket. I'm really enjoying this one, even though it's going slow with single crochet.
Hopefully the weekend will allow some crochet time ☺
I'll keep you updated.
Thanks for popping by ♥
Friday, 6 November 2015
cute - your creative wings
Hello there, I'm back to share another page using the fabulous chipboard from Your Creative Wings. I had a lovely scrappy day with a friend last week and created this fun page!
I used chipboard pieces from the Lots of Cogs set - and yes, this item does have a lot of cogs! It will definitely let you create a few pages and maybe more ..... ☺
I have given the chipboard pieces some colour to match in with the photo - first painting them white and then adding shades of blue. I love stamping and use my script stamp a lot; so you will always see bits of script on my work!
To make a feature embellishment, I layered two pieces of cogs and then added a button.
I love how this page came together - cogs are great for boys pages!
I hope you feel inspired to create a fun page with chipboard ☺
Thanks for popping in ♥
Monday, 2 November 2015
pancakes everyday - Scrap the Boys
Hello there and happy November ☺
I'm sharing my page for the Scrap The Boys November challenge - the theme being food.
Here's my page:
My littlest lad just loves pancakes for breakfast!! I had these happy pictures of him and they fit the challenge well.
I was inspired by the picture with the sprinkles on the donut - I had this 12x12 paper from Pink Fresh Studio which made the perfect base for this page.
I've kept it fairly simple with some embellishments from my stash, including some Amy Tangerine.
Here are some close-up's:
I've used a Kaisercraft alphabet die and some glitter paper to create one part of the title - also using a wood veneer.
I have also included a few different stamps - these ones are by Kellie Stamps.
There are two fabulous prizes up for grabs this month, so hop over to the blog and check it out - there's plenty of DT inspiration too.
Thanks for coming by ♥
Thursday, 29 October 2015
hello - your creative wings
Hello, there! This is my first post for Your Creative Wings as a Creative Team member☺ I've been having a wonderful time playing with the chipboard and am sharing this page today.
I've used two pieces of chipboard for this page:
Feathers on a stick and a Doily
I love a banner style design, so the feather chipboard was perfect. The chipboard was cut in two so I could place a piece on each side of the photo. I've stamped onto the chipboard with versa-mark ink and a doily stamp, then painted over with a DecoArt sealer.
To make the doily a little feature on the page, I've punched out a circle in pattern paper and added it to the chipboard. Then I've made a faux flair by punching out a smaller circle from pattern paper and added a clear raised sticker.
Here's a closer look at the feathers with the stamping. The sealer I've used has is crystal glitter by DecoArt and gives a nice shiny finish to the chipboard.
Pop over to the Your Creative Wings shop online and view all the fabulous chipboard.
I have another page to share very soon.
Thanks for popping by ♥
I've used two pieces of chipboard for this page:
Feathers on a stick and a Doily
I love a banner style design, so the feather chipboard was perfect. The chipboard was cut in two so I could place a piece on each side of the photo. I've stamped onto the chipboard with versa-mark ink and a doily stamp, then painted over with a DecoArt sealer.
To make the doily a little feature on the page, I've punched out a circle in pattern paper and added it to the chipboard. Then I've made a faux flair by punching out a smaller circle from pattern paper and added a clear raised sticker.
Here's a closer look at the feathers with the stamping. The sealer I've used has is crystal glitter by DecoArt and gives a nice shiny finish to the chipboard.
I have another page to share very soon.
Thanks for popping by ♥
Subscribe to:
Posts (Atom)
school @ home
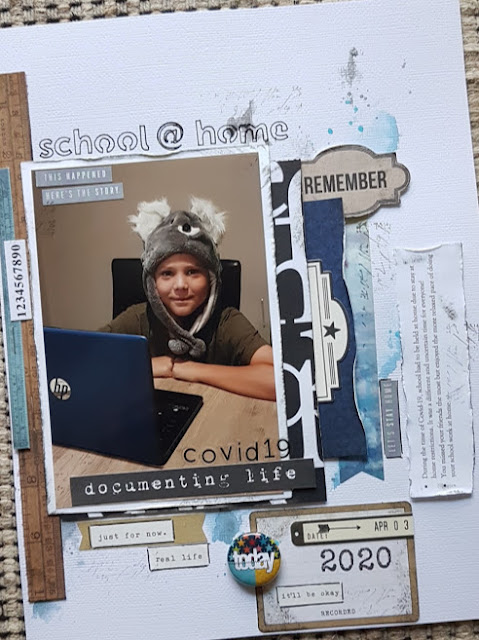
Hello, I definitely wanted to record this little moment! School @ home due to stay at home restrictions because of COVID-19. It was certai...
-
Sorry, this post is a little late, but here it goes for the blog hop....... Hello there Magnolia Lovers and Welcome to the 1st Birthday Bl...
-
IT'S GIVE AWAY TIME. ... to coincide with my Creative Bits clearance sale , I'm also having a give away. * a pile of coloured do...
-
I just love this picture of one of my boys - he's in his element - FISHING! Because I love it so much, I've done a bit of a repeti...