Thanks and have a lovely weekend ♥
Showing posts with label Tutorial. Show all posts
Friday, 21 February 2014
just be you
Hey and happy Friday - I have created this page and a step-by-step tutorial to go along with it for The Scrapbook Store using Bella Boulevard - Snapshots - a very fun collection. Please check it out on the blog: Step-byStep Tutorial.
Tuesday, 24 September 2013
The Scrapbook Store - Say Cheese collection by Simple Stories
Hello to you all ☺ It was my turn to provide a tutorial for The Scrapbook Store this month. I've been working with the Say Cheese collection by Simple Stories. I've created a scrapbook page using products from this collection as well as a Alta Matz WOW stencil and some of the distress glitter.
This is the page that I've created:
Please take a look at The Scrapbook Store blog to view the tutorial ☺ I had a great time creating this page, including some fun textures with stencils and glitters.
Thanks so much for taking the time to come and visit ♥
This is the page that I've created:
Please take a look at The Scrapbook Store blog to view the tutorial ☺ I had a great time creating this page, including some fun textures with stencils and glitters.
Thanks so much for taking the time to come and visit ♥
Saturday, 22 June 2013
Strong - Authentique - The Scrapbook Store
Hey everyone - I have this page over on the blog at The Scrapbook Store using the 'Strong' collection by Authentique!!
Take a peak and read along with my tutorial to see how I made this page using one of my favorite designs - a banner style page ☺
Hope you love it ☺
Take a peak and read along with my tutorial to see how I made this page using one of my favorite designs - a banner style page ☺
Hope you love it ☺
Thursday, 21 March 2013
a day to remember - March DT Kit for The Scrapbook Store.
Please pop over to The Scrapbook Store blog and check it out.
Here is the page I created - I'd love to know what you think!!
this page is out for publication ☺
Monday, 17 December 2012
same same
Hello - I had my turn this month to create a step-by-step for The Scrapbook Store - it's now up on the blog if you want to check it out ☺ I really wanted to show my process of making this page and how easy it came together using the Now & Then collection by Teresa Collins - there are many die-cut embellishments in this collection which making the process fun, easy and quick and very coordinated. You can check out the entire collection on-line here!!
Wednesday, 25 January 2012
bubble wrap designs
you will have noticed that my last few LO's have had a painted/misted background made from bubble wrap - I thought I'd take a few pictures of the process and show you how I got that effect.
... after I'm happy with the amount of paint/ink/glimmer mist I have on the bubble wrap - it's time to lay your 12x12" paper over the top of the bubble wrap - press down over the page so that it soaks up the different mediums - when you lift it up, you will get a nice surprise at the patterns and textures - I just ♥ the big dot effect this bubble wrap gives.
... now I have a selection of backgrounds to work with - you can keep adding paints and mists to your bubble wrap - you will be amazed at how many background papers you can make up with this method, as well as little tags.
Thursday, 10 June 2010
Mad for Markers Challenge
Sammi from Mad for Markers has another challenge running on her blog - Colour with Copics on something other than paper!
I had to have a little think about this challenge - I tried a few different mediums, then settled with this little project - Colouring on Calico.
I've done up a step-by-step photo tutorial on how I coloured, then created a fabric rose.
And this is how I've used my fabric rose:
I've used some pattern paper by Stampin'Up and October Afternoon, then placed a paper doily as a background.
Then I've added my embellishments:
* fabric calico rose; I've added a half pearl to the centre.
* patchwork doily flower from my Etsy shop
* pink daisy flower - these were white - I've coloured them with Copic markers, adding a doily to centre and a yellow corduroy brad.
* butterfly with rhinestones
* Labels 3 Nestabilities with sentiment from Amy Rysavy stamp - All That Scraps.
Here's a closer look at the details:
Thanks for poping past.
Subscribe to:
Posts (Atom)
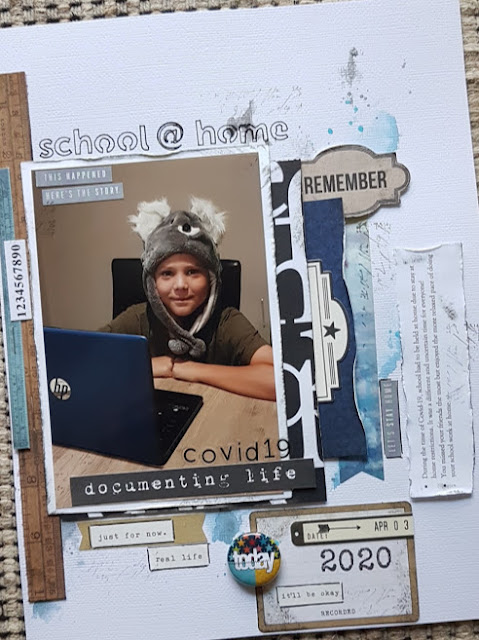
school @ home
Hello, I definitely wanted to record this little moment! School @ home due to stay at home restrictions because of COVID-19. It was certai...
-
Sorry, this post is a little late, but here it goes for the blog hop....... Hello there Magnolia Lovers and Welcome to the 1st Birthday Bl...
-
IT'S GIVE AWAY TIME. ... to coincide with my Creative Bits clearance sale , I'm also having a give away. * a pile of coloured do...
-
If you have arrived here because you are hopping along with the Stuck?! Sketches blog hop, welcome! One lucky winner from those hopping will...