Showing posts with label Design Team. Show all posts

Tuesday, 29 April 2014

a little bush family

 Hey everyone, popping in to share another creation that I've done with my DT kit for April from The Scrapbook Store - this one is a bit special: the photo's, the people and the project ☺  I have my lovely sister to thank for the gorgeous photos I could use - Aimee Claire Photography!
And the beautiful people are my brother with his wife and gorgeous kids!!
I've created a mini album with the file folders from the Hello My Name Is collection by Teresa Collins.  I've done one of these before and they are fun!!!  When I received the folders in my kit, I just knew I had to make another one.


So here it is - I've made a little slide-show video - hope you enjoy it ☺
  You can watch the video HERE.


Product used:

twine
script stamp
Canvas flower - Prima Marketing
Heidi Swapp Colour Shine - Tinsel

Well that brings us to the end of April already.  This is sadly my last post for The Scrapbook Store as a Design Team member as I will be finishing up as of the end of this month.  It's been (nearly) two years and it's been amazing - truly a wonderful team to be a part of.  I have loved working with fabulous kits each month and hope I have inspired you all with my scrapbooking style.
So this does not mean I will stop scrapbooking - it simply means I won't have any DT commitments for now - I still hope to continue with my craft and share what I love and do.
Maybe I can join in with some challenges around the place .........
And I'd love to focus a bit more on my Project Life ..........
And having a bit of extra time will allow me to spend more time with the important people in my life: my family ♥
A big thank you to my readers for your lovely comments ♥♥

Thursday, 24 April 2014

this is me

 Hello - hope you are all well.  We are enjoying school holidays but I've still managed to squeeze in some crafting time and work with my DT kit from The Scrapbook Store.  The second collection I received was Hello My Name Is by Teresa Collins - one of my favourite product lines ☺
This collection has a rather neutral palette with some deep red colours too.

Project: April DT kit
Title: This is Me

 Here is a sweet page using pictures of my littlest man!
I've done a banner style design and used lots of the fun embellishments and words in this collection.  I've also used a little bit of Dusty Attic chipboard.
Here are some close-up's:

 Lots and lots of little words and journalling ☺  You can find these all in this collection. There is a great mixture of stickers and chipboard elements.  For the piece of chipboard - love this - I've sprayed with some HS Colour Shine to give it some glimmer.
 As with alot of the collections these days, also included are some 4x6 journal style cards - I've cut one out and then added some tear-off words to each section.  This row of adorable buttons is from the Decorative Button pack.
Using different fonts and words is all the rage with titles these days, so I've included a sticker and some wooden bits - all from this collection.
I'm always impressed by the extra bits you can get in the Teresa Collins product lines ☺
You can check out the entire collection in store now!!

Product used:
twine
mini pegs
script stamp - Prima
espresso ink

Thanks for coming by - I'm working on a mini album using the file folders in this collection - cannot wait to share that one soon ♥

Tuesday, 15 April 2014

Project Life


 Hello there, back again with some more inspiration using my DT kit from The Scrapbook Store.  I've created this double page Project Life spread, using some of the papers and embellishments from Daily Flash All Boy by October Afternoon.
I've decided to record Project Life monthly this year, so this is part of January!


 Here are some of the details:

 The smaller 3x4 cards are from the Memory Card pack - they fit perfectly into these pockets.  I've added in a small photo onto the yellow one!

 Here are some more of the 3x4 cards and I've popped in a photo too - the little stamp used here is by Technique Tuesday Stamps - Everyday Words.  I've also used a flair badge - this one being January - I'm planning to use these through-out my album for each month ☺
This flair badge is from the OA collection and I've popped it onto one of the die-cut cards. 

So many collections have allowed for Project Life use and I've really been enjoying the challenge of using different collections in my album to make it work ☺

Products used:
Daily Flash Storyteller Alphabets
black pen
Studio Calico - Wood Veneer
 

Monday, 31 March 2014

Project Life


 Hello and happy last day of March!!!
Just popping in to share some final work that I've done this month for The Scrapbook Store using Abroad by Authentique.

Here I've created a Project Life double page spread using my Instagram photo's from our Summer holiday.  The papers and embellishments worked in well with the travel themed photo's.  And even though this collection is not Project Life orientated, there are still some elements that I could use, as well as the pattern papers for the background cards. ☺

Project:  March DT kit for The Scrapbook Store
Title - Project Life

 This is Page 1:
 As well as using the papers and embellishments from this collection, I've also slipped in some other elements that I had on my desk, including some fun chipboard shapes from Blue Fern Studios.
Here are some close-up's:

 This card with the wording is from the die-cut pack and fit well in the 3x4 pocket.
For the chipboard shape, I've covered in gesso and then added a layer of modge podge.

 The stamps are by Teresa Collins and I've also added in a flair badge.
 This one is page 2:
It comprises of lots of photo's - the Instagram photo's worked well in these pockets being the right size at 4x4".
Here are some close-up's:
 I've added in more chipboard and also one pocket holds my journal work.
The 'camping life' title is done with the Memory Box stencil and I've added in a postage stamp die-cut.

Product used:
Teresa Collins stamps - Family Stories
flair badge
gesso
modge podge
washi tape
alphabet sticker letters

You can check out the entire collection online HERE.

Tommorow I'll be back with the April sketch ☺
Thanks for coming by ♥♥

Thursday, 27 March 2014

capture the moment

 Hey there, hope your week has been going well!!  Today I wanted to share some more from my March kit for The Scrapbook Store.  The second collection I've been working with is Abroad by Authentique - perfect for the travel themed photo's.

Project: March DT work - The Scrapbook Store
Title: capture the moments

 My oldest son loves to take pictures and I found this one on my camera - a 'selfie' that he had taken for his digital media class.  It fit in well with this collection , especially the saying on the banner which gave me the inspiration for this page.
I've layered the pattern papers, used some Prima Stamps, added in embellishments from the collection and even managed to use some chipboard & Hambly transparency ☺
Here are the close-up's:

 Loved the saying on this banner - it's from the die-cut pack in this collection.
 This is a gorgeous Prima bloom - in the background I've used the lovely Stitched Circle stamp by Prima.  I've gone with a bit of 'circle design'  using stamps, chipboard, the transparency and some flair badges.
The sticker letters used in the title are from my stash.  I've put in a shipping tag that is peaking out from behind the photo and have arranged more of the die-cuts around the photo.

Product used:
shipping tag
sticker letters
twine
Hambly transparency
script stamp - Prima
stitched circle stamp - Prima
Prima bloom - Serenity
cotton thread

You can check out the whole collection in The Scrapbook Store.  Don't forget to check out new products as they come in store - you can find them HERE

Monday, 17 March 2014

playful & happy

Hey and happy Monday ☺  I always love the start of a new week! There is something nice about starting fresh.  Today I'm sharing another page I created with my DT kit for March from The Scrapbook Store.
I've been working with My Minds Eye - Now & Then - Izzy collection.

Title: playful & happy
Project - March DT work for The Scrapbook Store 
 The photo's are really colourful, so I haven't added in too much extra colour!
 I used a little of the pattern paper, bits from the Ephemera Pack and also made use of the packaging.  Recyle - Reuse ☺
I have also played around with a Memory Box stencil - this one is called Texture Shine.
Here are some close-up's:
 Here is some of the Ephemera bits - I have the texture work coming out from behind the photo and have added in some black pen lines.
And I've used another of the flair pins!
Playful & Happy is the title - and these bits come from the Ephemera pack - a title doesn't always need to be uniform using the same types of letters ☺
And you can see peaking from behind the photo - some of the packaging.  I've added some little sticker letters to it too!

Products used:
Ephemera Pack - MME
Flair Pins - MME
Sticker letters - MME
modelling paste
black pen
packaging - MME
cotton thread
twine

There is still some of the MME collection left in the store - check it out HERE.  And don't forget - new products are always coming in - you can find them HERE.
Thanks for coming by ♥

Thursday, 13 March 2014

live every moment

 Hey everyone, hope your week is going well ☺  I'm here to share another page using my March DT kit from The Scrapbook Store.  I'm loving creating with MME - Izzy collection from Now & Then.  Super fun - I love their patterns on the 12x12 and am finding that I don't need to shy away from these ones ☺

 My oldest son has been sharing my camera with me, using it for his digital media classes.  So I'm getting some lovely pictures to use for my scrapbooking!!  This picture was one of them. 
With a busy stripey background, I've keep the design quite simple and I love how it's turned out.
Here are some close-up's:

 I've made a banner with a 3x4 journal card and elements from the Ephemera Pack!  I've also used a banner from Heidi Swapp - Ephemera Pack.  The wooden hearts are by Studio Calico.
 I've matted my photo onto a white lunch bag and pattern paper.  I love the flair pins, they measure 3cm across, so are a little bigger than your average flair!!
Here's another view of the banner.  I've used some little sticker words for my journal work - these are also MME.  You get four stickers sheets in the pack - great value ☺

Products used:
white lunch bag
MME - sticker words
MME - Flair Pins
cotton thread
script stamp
espresso ink

I have one more page to share from this fun collection - I will be back with that real soon.
Thank you so much for taking the time to check my blog ♥♥

Monday, 10 March 2014

now & then

 Good morning and a happy Monday to you all ☺
Today I'm sharing one of my pages that I've created with my March kit from The Scrapbook Store.  I'm working with the Now & Then - Izzy collection by My Minds Eye.  This is one of those fun and versatile collections, suitable for all types of scrapping.
Here is my first page!

Project: March DT Kit - MME - The Scrapbook Store
Title: Now & Then
I've gone with a mixed media background - lately I've been playing around with textures, stencils, gelatos and mists - all very fun to combine.  I also happened to use some packaging from MME which in turn became my title ☺
Here are some close-up's:

 For the textured pattern - I've used the Texture Mesh stencil from Memory Box!  I have found that when doing mixed media it's best to let each layer dry naturally, rather than speed dry.  I tend to have a mixed media project on the side, so I can keep going back to it and take my time.  I've built up the layers with paint, ink, mist, gelatos and stamps.  For some extra details, I've also used a black pen with the same stencil.

 Here is that lovely piece of packaging!!  I covered some of the printed words with sticker letters by MME - I've also used a flair pin from this same collection.
This collection has some really cool 3x4 journalling cards, great for Project Life.  For this page, I've layered a couple under my photo as seen above!
Here is my journal work with my typewriter. 

Products used:
Flair Pins - MME
Sticker letters - MME
Ephemera Pack - MME
ink
script stamp - Prima
stitched circle stamp - Prima
mist
paint
modelling paste
cotton thread
black pen

I will have another couple of pages to share using this great collection - MME is always fabulous.  Please check in the store to view more from this collection ☺
Thanks for coming by ♥

Tuesday, 4 March 2014

backyard boy

 Hello crafty people .......... and hello March!!  Already ☺  Today I'm sharing my take on the sketch for The Scrapbook Store.  Check out this fun sketch, full of cool elements.  Remember, sketches are a starting point - a fun place of inspiration ☺

Project: March Sketch - TSS
Title - Backyard Boy

 And here is my page:
 I've stayed true to the over-all feel of the sketch - just flipping it over to one side.  I've also used two smaller photo's of my happy little man ☺
 I've used some bright and happy papers by Bella Boulevard as well as Heidi Swapp Color Magic + Colour Shine.  My title is chipboard by Blue Fern Studios.'
Here are the details and close-up's:
 Color Magic + Color Shine = a great combination - lots of fun and shimmer ☺  This heart is from the Resist Ephemera Pack - it's filled with lots of fun shapes which have a resist pattern on them - the pattern is revealed once you've sprayed over with Color Shine.
 And here are more elements from the same pack - I've used assorted Color Shine sprays.
For the title: I've covered in gesso and then sprayed over with Color Shine - inking the edges once dry.

Product used:
espresso ink
black pen
script stamp
modelling paste

Please check the gallery for more inspiration - we hope you can play along this month - as always there is a lovely $40.00 voucher for the randomly picked winner.

You can read all about the latest news in the Newsletter!!

Thanks so much for coming by ♥♥

Thursday, 27 February 2014

the details

 Hello to you again ☺I have one last page to share using my DT kit from The Scrapbook Store.  I've basically used up the left over bits from my kit of Bella Boulevard - Snapshots.

 This page was more about the journal work - I think it's important to journal how we feel and share some of the more finer details.  Hopefully my boys will love to read this oneday ☺
I did a bit of machine stitching for this page too - here are some details:
 I've matted my photo onto pattern papers and then stitched in some papers and hearts together.  I really love that paper with the arrows!!  I have a sticker tab from this collection along the top of the photo - brother.
I didn't cover too much of the fantastic pattern paper with all the 'arty doodling' - very cool!!
I did my journal work on the computer and also matted it onto pattern papers and added in some stitching, cotton thread and a mini peg.  I just adore them ♥
The title is sticker letters from my stash and I've also stitched a line thru the middle.
The strip of star paper is from the 12x12 border sheet - these border sheets go a long way when you cut each strip individually - great for creating sections on your page too!!

Products used:
cotton thread
sticker letters
heart punch
machine stitching
MME sticker words
espresso ink
script stamp

Just a few more days left of this month - wow February went so fast.  I have some exciting paper collections to share next month, so can't wait for that.  Our sketch challenge is still up and running - a few more days left - check out the gallery - there are lots of great entries.
Thanks so much for coming by ♥

Monday, 24 February 2014

best day ever

 Hey everyone and happy Monday.  I have a little more inspiration to share using the sweet collection Snapshots by Bella Boulevard.  It's a great one for those everyday moments.

 I've used lots of the pattern papers to create a layered design.  I've teamed the papers with a wood veneer phrase by Fancy Pants and some other fun embellishments.
Here are close-up's:

 I've added script stamping to the wood veneer and have placed it over some twine and a crochet doily.

 Here you can see the layers that I've added with assorted patterns.  I've even used some 'off-cuts' that had some pieces punched out!  Always good to use the scraps ☺
There are fun embellishments: flair badge, mini pegs, resin flowers and a wood veneer frame.
I've attached a sticker tab to the photo and an adorable caravan flair - this photo was taken on our Christmas holidays ☺

Product list:
Tab stickers - Bella Boulevard
Fancy Pants - Wood Veneer phrase
crochet doily
staples
script stamp
espresso ink
resin flower
Mini pegs
twine
heart punch

There is still some of this fun collection in The Scrapbook Store - please check it out online ☺
Thanks so much for coming by ♥

Friday, 21 February 2014

just be you

Hey and happy Friday - I have created this page and a step-by-step tutorial to go along with it for The Scrapbook Store using Bella Boulevard - Snapshots - a very fun collection.  Please check it out on the blog: Step-byStep Tutorial.


Thanks and have a lovely weekend ♥

Friday, 14 February 2014

sweet friends

 Hey there, it's the end of another week already.  I'm just popping in here to share another page that I've created using Beachcomber by Fab Scraps for The Scrapbook Store.  I had lots of fun with this one and used some cute paper dolls that were included in the die-cut pack. 

 I had taken this picture of my little boy with his little friend the other week on a camping trip together and it fit in perfectly using the paper dolls ♥♥
As well as a few little pieces of the pattern paper, I've used Manorhouse Creations flowers, Prima flowers and a stamp set by Lawn Fawn.  Here are some close-up's:
 
 It was fun using flowers on my page - especially these big blooms by Prima and Manorhouse Creations. 
 Here are the cute paper dolls, fussy cut from the die-cut pack in the Beachcomber collection.  I've used a couple of stencils in the background with texture paste.  Also in the background are some little heart stamps from the Blue Skies stamp by Lawn Fawn.
I've paper pieced some little clouds - these are from the same stamp set again - and the title is sticker letters from my stash.
The chipboard frame is left-over from a piece of chippie - I'd used the inner piece on a previous layout.  Can't waste anything ☺
I know I said it before but I really enjoyed putting this one together. ☺

Product list:
texture paste
sticker letters
muslin
Prima blooms
circle punch
script stamp
espresso ink
typewriter journal work
black pen

Next week I'll have some pages to share using Snapshots by Bella Blvd - can't wait to share them.  Have a beautiful weekend. ♥

Wednesday, 12 February 2014

Beachcomber by Fab Scraps ~~~ The Scrapbook Store

 Hey crafty people.  Today I'm sharing some inspiration for The Scrapbook Store.  This month I'm working with Beachcomber by Fab Scraps.  A gorgeous seaside collection ☺

Project:  Busselton Jetty
 I usually like to use white paper for my backgrounds, but with this collection I couldn't really ignore the lovely pattern papers with pre-printed pictures and designs on them.  They reminded me of a water-colour painting ☺
Here I've teamed the papers with a 'light-house' diecut from the Beachcomber collection, some shells collected at the beach and a Manorhouse Creations flowers.
Here are the close-up's:
 I love the pretty ornate frames by Manour House Creations - I usually cut them in half to make them go further ☺
I've cut out a little beachhouse from the DieCut pack and added a flair to it.
I've created a beachy feel with muslin,twine and shells and added in a Manor House flower in bright blue.
 Here is the lighthouse die-cut - there are a number of these in the pack - all in different patterns.  I've also cut out more element from the die-cut pack.
 And a close-up of my journal work with my trusty manual type-writer.
There is still some of this collection available in store - please check it out here.

Product used:
twine
shells
texture paste
ink
script stamp
muslin
flair badge

And here is my second page using this collection.
Once again, I've used the pattern paper as my base.  Here I've printed out the photo onto vellum and then the other onto normal photo paper.  I always love this effect ☺

Project - Under the Sea
 This is one of my twins favourite activities - being under the water and exploring - I love this picture of them ☺
The chipboard jetty is part of the Beachcomber collection.
Here is a close-up:
I've left the chipboard raw, so as not to takeaway from the detailed lines and features.  I've simply inked the edges with espresso ink!
I've cut out this word from the Die-Cut pack.

Product used:
ink
script stamp
black pen
enamel dots
sticker letters (from my stash)

I hope you have enjoyed checking out this collection with me - don't forget to check out what's new in the shop - you can find it here.

Thanks for coming by - I will be back soon with another 'cute' page from this collection ♥

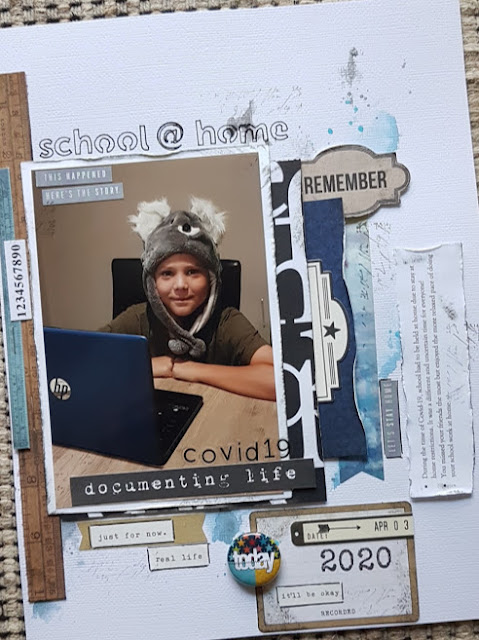
school @ home

Hello, I definitely wanted to record this little moment!  School @ home due to stay at home restrictions because of COVID-19.  It was certai...