Friday 27 June 2008

Happy mail!

I got a lovely surprise when going to my letter box today. Two beautiful cards from two of my downlines, Marion & Monique. They sent these to me as part of Stampin'Up e-Scape month. So I wanted to share their creations, as I think they are very well done.

The first card is from Marion. I love the colours she has chosen, Wild Wasabi, So Saffron, Sahara Sand and Whisper White. She's also used the Polka Dots & Petals stamp set with the Punches to make a very effective design. Just love it Marion and thank you so much!


And this card is by Monique. She's used one of my favourite colours - Choc Chip, with Certainly Celery & Whisper White. I love the stamping arrangement she has made with the flowers and tag and then finished it off with the Spiral Punch. And the sentiment - Rubber Stamped - tap, tap, tap - 365 days. So cute Monique; thank you very much.
Monique also has her own blog, on which she has been posting her lovely cards and creations. It's linked to my blog on the left, so take a look!!


All images © Stampin'Up 1990-2008


Thursday 26 June 2008

Colour Challenge #13 - K Werner

The colours for Kristina's Colour Inspiration are: Purely Pomegranate, Regal Rose, River Rock, Wild Wasabi & Whisper White. Fantastic colours; I love the In-Colours from Stampin'Up.
So here is my card for this week. Have chosen to use the Priceless stamp set. Using the River Rock colour threw me out a little bit, probably because I don't normally combine so many different colours, but that's the great thing about challenges!!
The card is fairly simple. I've used the rock'n'roll technique on the butterfly and poped it up with dimensionals.
Another pretty card for my stash!!


All images © Stampin'Up 1990-2008

Mass production with Designer papers

I promised you more cards using the 'Unforgettable' stamp set. Well, I've done just that, though the frogs are no where to be seen!!

With these cards, I'm showing how easy it is to mass produce your cards using Designer paper from Stampin' Up, single image stamps and smaller stamps to make your own background paper.
* Each card is the same design.
* Divided into three sections, each card has three different patterned papers.
* The bottom and second strips of paper are Designer Papers, co-ordinating from the same pack.
* The Designer papers are double-sided, so I've picked a pattern that I like, then simply turn it over to get another pattern.
* The top strip is Whisper White with an image stamped over to make it your own patterned paper.
* I've used the dragonfly and snail image from the 'Unforgettable' stamp set. These are simple little images which can be coloured in and then matted onto circle or square cardstock.
* Cards have been finished off with ribbon and a sentiment

Using this method, you are able to produce simple but effective cards; and it's very easy to mass produce. The Designer paper packs from Stampin'Up make is easy to co-ordinate all your colours. And it's amazing how you can put so many different patterns together. I wouldn't normally make cards using so many patterns, but this was a fun project to do and even more pleasing when you see how many cards you can come up with in a short amount of time.


Designer Paper Fall Flowers, flower stamp on top strip is from Polka Dots & Petals.
Designer Paper Berry Bliss, circle stamp on top strip is from Pick a Petal. The circle on which the dragon fly is stamped, has been clear embossed.
Designer Paper Spring Break, stamp on top strip is from Polka Dots & Petals. The snail has Dimensional Magic on it.
Designer Paper Loves Me (previous catalogue), stamp on top strip is from Polka Dots & Petals. On the square cardstock with snail image, I've used the Heat & Stick powder with glitter.

All the sentiments are from So Many Sayings (hostess set)

All images © Stampin'Up 1990-2008

I hope I've inspired you all and given you some simple idea's on how easy it is to mass produce your cards, especially with the Designer paper and a few stamps.

Wednesday 25 June 2008

Unfrogettable Kids cards

This months theme for my upline's, Demo Get Together, is Kids Cards!! So what better set to use, than 'Unfrogettable'. It's sooo cute and one of my new sets to play with.
I've made a pocket card with a fun froggy tag!! This first picture shows the card with the tag inside.
Base of card is Real red, layered with More Mustard and DP from East Coast Prep. This is a great pack to use for kids cards - lots of bright colours. On the base card of Real Red, I've stamped the flower in Real red ink and hi-lighted with the white gel pen. The sentiment has been stamped in black.
The mushroom has been stamped onto more DP from the same pack and I've cut out, poped up with Dimensionals onto the DP circle piece and then onto the Scallop circle. The edge of the Scallop has been paper pierced to finish it off.
Here's a close-up of the tag. I've stamped the frog in Stazon Black on the Whisper White. The body of the frog has been 'paper pieced' and the legs are coloured-in with markers. His little eye's have Dimensional Magic on them, to give it a raised look!

Here is a picture of the whole creation. Ten pocket frog cards!! Was a fun little creation and I hope to show you more with this set very soon.

All images © Stampin'Up 1990-2008

Saturday 21 June 2008

My three handsome boys!

We went out for a bit of fresh winter air this afternoon, and had a look at the jetty. Even though the sun was out, it was pretty chilly with the wind. The boys still enjoyed an ice-cream and managed some camera-poses for me. This photo was Tyson's idea. He said: "mum, can you take a nice photo of us?" How sweet and he has the biggest grin!!


Here's a picture of the beach just to the right of the Busselton Jetty. I'm always amazed at how much the beach changes from Summer to Winter. Due to some recent storms and strong winds, the usually white sandy beaches, are covered in seaweed, even this smaller jetty has seaweed dumped on it.

Colour Challenge #12 - K Werner

Another colour challenge by the clever Kristina - she's finding such great inspiration for us!! The colours are: Sahara Sand, Wild Wasabi, Whisper White & So Saffron
And here is my card creation, something pretty and sophisticated!! I've used a new stamp set which hadn't seen any ink yet: Oh so Lovely (hostess set).
Base card is Wild Wasabi. Next layer is Sahara Sand which I've stamped with En Francais in Whisper White ink. So Safron DP has been torn on edge. The main image is stamped with Stazon Black and coloured with ink pads & aqua painter. I've added dimensional magic to the little flowers.
For my embellisments I've added white grosgrain ribbon, some small tags, a flower from the pretties kit and a couple of 'bling' brads.


Some things I enjoy about the various colours challenges is that I'm using a variety of stamp sets, some which haven't seen ink!! It's fun to see what designs you can come up with, using only a few colours and possibly colours you would not normally put together. And by joining in with these challenges, I'm getting quite a stash of cards for my basket. Handy to have!!

All images © Stampin'Up 1990-2008


Thursday 19 June 2008

Update on house renovations!

Here's my effort for today - some homebaked goodies for the boys to enjoy!! I love cooking in my new oven.
And here's a picture of the flooring. The Living area and Kitchen are now done. It looks so nice, more so in real life. The picture does not do it justice, but you get the idea. It's created a very 'warm looking' area and I'm really happy with the end result.

Javabellas!!

A non-Stampin'Up image card for today!! I have a few Bella stamps which are such fun to work with. This is a new one which hadn't seen ink yet, so for a change, I decided to make up a card with it.
The image has been stamped in Stazon Black and I've used ink pads and aqua painter to colour in. I've also paper pieced the pink dress (bit hard to see in photo)
Colour of cardstock, which is Stampin'Up: Sky Blue, Groovy Guava, Purely Pomegrante & Whisper White. The Guava cardstock has been run thru my Cuttlebug with the Paisley embossing folder.
Card has been completed with bling brads, photo corner punch and 'cherish' sentiment!
A fun card to send to a friend!!!


All images ©Stamping Bella 2008

Tuesday 17 June 2008

New goodies & 'love note' cards!!

My new goodies arrived yesterday: three great stamp sets and the Pretties Kit - my choice for the Product Bonus from my promotion to Senior Supervisor. So I had to have a play today!!
Seeing as Stampin'Up ® is promoting E-Scape for the month of June - which is getting away from emails, e-cards etc, to making a card and sending it thru the mail, I thought I'd make use of a pack of Love Notes I had in my stash and use my new stamp sets. Love Notes are cute little cards measuring 7.6cmx7.6cm, perfect to add to a gift, hand deliver to a friend or pop in an envelope and send to someone with a message of love!!

Check this link to see the full promotion details
http://www3.stampinup.com/au/ena/5840.asp


'Priceless' stamp set
'Fabulous Flowers' stamp set with the Pretties Kit
'Unfrogettable' stamp set

All images © Stampin'Up 1990-2008

Friday 13 June 2008

Colour Challenge - K Werner Designs

Another colour challenge, this time by KWerner Designs. Every week she comes up with a new inspiration for us stampers, who love to be challenged!! I have her linked to my blog, if you want to take a look and join in the fun!! So here is the inspiration. Colours are: Rose Red, Old Olive, Whisper White, Going Gray, So Saffron.

And here is my card created from those colours. I found it a bit more challenging than the usual 'three colour' challenges I do, but this was fun and I really enjoyed putting this card together.
On Whisper White cardstock, I've stamped randomly, some of the stamps from Garden Whimsy. I've also stamped a few butterflies with versamark and embossed in clear - those are the shiny bits you can see!! Then using my SU punches, I've created the squares. What would I do without my punches - they make it quick and easy. I've used Designer Prints in So Saffron. Scallop edge has been done using the slit punch to which I've added paper piercing. The card has been finished off with some white grosgrain and 'wonderful' sentiment from Warm Words.

All products used are Stampin'Up ®
All images ©Stampin'Up 1990-2008


This will be all from me til next week, we are going away for a few days over the weekend. I'm sure I'll have pictures for you!! And an update on my baby bump. Well, the bump is getting big and uncomfortable. Only NINE weeks to go!! Getting excited and I can't wait to see what it is.

Thursday 12 June 2008

SCS Colour Challenge 170

I'm really enjoying taking part in the SCS colour challenges. Most challenges are colours that I wouldn't normally use or put together, so it's great to try different things out!! This weeks colours are: Real Red, Regal Rose & So Saffron and here are two cards.

This first card was really a quick and easy one to make up. I've layered the different coloured cardstock, So Saffron being the Designer Print. On the white, I've stamped randomly from Cause for Celebration stamp set (Hostess set), in the three colours. Then to soften the effect, I've layered some vellum over the top and fastened with So Saffron coloured brads. It's been completed with wide grosgrain in Regal Rose and the stamped sentiment 'wonderful' is from Wonderful Favourites.

This card starts off as a 10.5cm square card onto which I've added a 'topper'. I pulled out a stamp set, Like it a Latte, which I haven't used for so long. It will be a handy card to have in my stash for the many birthdays that come along!!
Again, I've used So Saffron DP. The coffee cup has been stamped in the different colours and I've added some sparkle to the heart with Dazzling Diamond glitter.


All images © Stampin'Up 1990-2008

Sunday 8 June 2008

Boho Backgrounds & DSP Outlaw

After using Boho Backgrounds stamp set and DSP Outlaw for my note card holder, I wanted to keep going with the fun, so I made up some cards!! I like how you can use this paper for any kind of card. These first cards are masculine - seeing as I have two birthdays for tommorow.

I've swiped the base of card with my ink pad, to give it a distressed look.

Stamped image above is from Summer by the Sea stamp set which has been stamped onto watercolour paper and coloured in with SU markers and aqua painter - love this technique.


These last two cards tend towards feminine, with bling, ribbon and paisley print. The sentiments in last card have been hi-lighted with Dimensional Magic. These cards were fun to make and I just wanted to share how a simple stamp set of only 4 stamps, can go along way and is very versatile for any kind of theme. Using the DSP Outlaw makes it quick and easy, especially when deciding on colours.
All images © Stampin'Up 1990-2008

Saturday 7 June 2008

Note card holder

Ok, so here is the note card holder I've been busy with. So pleased with the end result - was fun and easy to make. Firstly, my inspiration and direction came from this website:
http://danniesdesigns.typepad.com/my_weblog/2008/06/note-card-holde.html
Certainly go and have a look at this tutorial to understand how the project is made. I have followed the general idea, just adapting some measurements to suit, as I find our measurements differ from the US!! So I will give you my measurements if you wish to make one of these yourself.

You will need:
Note card holder - 1 x A4 cardstock
I've scored at 4cm with cardstock in landscape position and at 14.5cm & 15.5cm with cardstock in vertical position.
The 4cm is for where the notes/envelopes will sit inside holder, once the cardstock is folded up.
The 14.5cm & 15.5cm is the spine of the holder

Fold all scored lines and cut as directed(refer to tutorial link)
You will notice in the picture below, I've fastened the cardstock together with eyelets on each side. Another alternative to using tape and I found it helped the notes to sit nice and snug. Since having the Crop-o-dile, I'm using eyelets alot more.

The front and back of holder have been finished off with cardstock and DP.
These are my measurements:
Cardstock - 13cm x 16cm
Designer Paper - 12.5cm x 15.5cm


This is how the note holder looks when opened up - one side for notes and one side for envelopes.
For this note holder, I've made a set of five notes (pictured above)

I've used mostly Boho Backgrounds stamp set and Outlaw DP. Colours in this theme are: Choc Chip, Creamy Caramel, Really Rust, Sage Shadow and Very Vanilla. I would never have put these colours together, before Stampin'Up came up with the Boho West theme. I just love it now!!


The end result - 5 notes with matching envelopes and their own matching holder. A perfect gift.
The notes measure 10cm x 15cm with standard C6 envelopes
All images Copyright Stampin'Up 1990-2008


Last few days.....

I've been spending the last few days with my sister-in-law and best friend, Renae. She came down to Busso for two days. And we had a very nice time, just hanging out together.

Lots of coffee, lunches, shopping, dinner and movies!! Yesterday, we drove down to Margaret River to have a look at the Berry Farm. We had the most yummy scones with jam and cream. I only took some 'after' pictures. These cheeky little birds were not very shy, eating out of the jam dish. Not sure what they are called, but they must be local, waiting for tourists!!


We had to buy some of their yummy products as well: strawberry jam and a few other bits. If you get the chance, the Berry Farm is worth a visit!!
We spent the rest of the day, wondering thru the fabulous shops of Margaret River, feeling very much like tourists. Ended up at the Bakery for lunch.
So that's what I've been up to the last few days. Very relaxing and enjoyable!!
I've have a little note card holder I want to share with you, so hopefully will be able to get that posted soon.

Wednesday 4 June 2008

Colour Challenge SCS - Scrapbooking

Last night I found out the colours for this weeks Colour Challenge over at Splitcoast. Blue Bayou, Soft Sky & Real Red. And they were perfect colours for these photo's. These are the last pages to go into my 6x6 album, which means it's up to date and ready as a gift!!


Even though the colours are quite strong, it hasn't taken away from the photo, which is still the main focus. The use of some simple stamps (Bugs & Kisses), punches, hodgepodge hardware and ribbon, makes for a cute layout. I'm pleased with how this turned out! These 6x6 layouts are so much fun, quick and easy to whip up and great for gift idea's.

All images © Stampin'Up 1990-2008

I'm hoping to make up some cards with these colours later on today. So I hope to post them as well!!

Tuesday 3 June 2008

6x6 scrapbook pages

I've been working on a small 6x6 scrapbook album of our family. I've never done this size before and always thought it too small. But after seeing how the album is coming along; I've decided it's a great size to work with. It only requires one photo per page and minimal embellishments. Anyway, here are a couple of layouts.


These first two pages, use colours from the Kristina Werner colour challenge of last week, which is very popular at the moment. Since I had black & white photo's, I thought I'd use these colours: Bashful Blue, Not quite Navy, Old Olive, Whisper White & So Saffron.
Stamps are from the Polka Dots & Paisley stamp set. I've also used the Paisley Print in the So Safron Designer Print paper.


I love how the colours turned out in these layouts. Choc Chip, River Rock, Very Vanilla & Ballet Blue. Very natual colours! I've also used the Natural Beauty stamp set which I haven't inked for such a long time. I thought the sentiments stamp was very fitting to describe the photo's.

One more page, and I'm up to date for this year so far. This little album is actually a gift, so unfortunately I won't be keeping it. The idea is that when I have new photo's of us and the boys, I can scrapbook them and send the pages off to be put into the album. A nice little record of 2008!!

All images © Stampin'Up 1990-2008

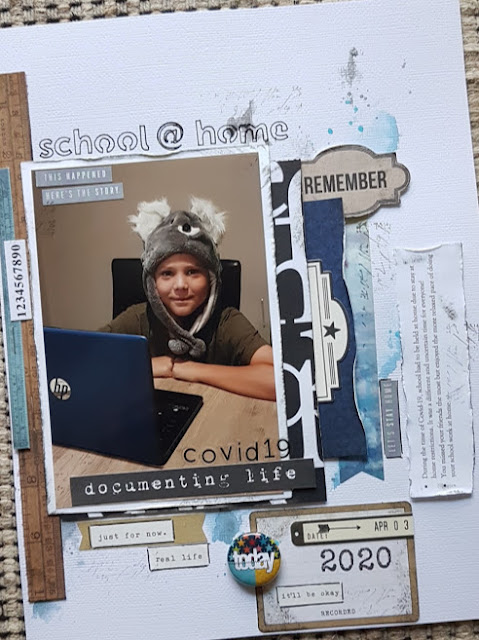
school @ home

Hello, I definitely wanted to record this little moment!  School @ home due to stay at home restrictions because of COVID-19.  It was certai...