Showing posts with label Projects. Show all posts

Friday, 8 January 2010

Creatalicious Challenge #5

I had alot of fun with this little project, a set of drawers which I created for the lastest challenge from Creatalicious!  When I first saw the challenge I knew I wanted to join in and use some of my new goodies.
So the challenge #5 is: something old, something new, something torn and something blue.
And here is my creation:

I've gone with a very vintage look, sponging the edges and uses soft colours.  I coloured the Tilda in with inks and aqua painter onto watercolour cardstock.

Here are the details for the challenge:
Something old: ribbon and pink pattern paper
Something new: Magnolia stamp, flowers
Something torn: paper
Something blue: pattern paper, ribbon and flower
And here is a closer look at the drawer!


Product used:
Stamps: Tilda with bike (Magnolia stamps)
Cardstock: White, pattern paper
Ink: Black Stazon
Others: ribbon, brads, lace doily, flowers, lace,

Wednesday, 26 August 2009

Box creations.

I came across this challenge website: Create4fun Challenges and saw a previous challenge using a really cute box template. The template can be printed out onto any cardstock, cut and scored, then assembled into the box. Boxes such as these are handy for little gifts and are just fun to make. So have a look at the link above and try one for yourself.

Here's two that I made up for some little thank you gifts.


I will be back tommorow with my scrapbook layout for Pic of the Week!

Sunday, 16 August 2009

Tri-Shutter card

Well I'm back after a little break from regular updates here. It's been a very busy past few weeks, with three birthdays in our family, including my baby who's turned ONE. I just can't believe how quickly his first year passed by. I'm sure the next one will be just as fun!
So between all the excitement, I did manage to stamp up a few creations. Here is one of them: a Tri-Shutter Card. I've admired these for some time now, always thinking they looked a little complex. But so many others were making them with stunning results, so I knew I just had to try one out. And let me tell you, they are super easy and so much fun.


I've used the Great Friend stamp set, teamed up with Walk in the Park Designer Series Paper. These are both from the new Spring Mini - available now!!
I used this tutorial from Jackies house of cards - the instructions were very easy to follow and she also has some great pictures to follow.
This card was sent off to a wonderful friend for her birthday last week, so I will def. be making another of these fun cards very soon!

Tuesday, 28 July 2009

Pocket Notes Purse - 3D project.

If you haven't made one of these cute little boxes, then you will want to very soon. They are so much fun and very easy to whip up. I was firstly inspired by Kirsty who made one and kindly passed on the link which you can view here for detailed instructions.
They are designed to fit the little love notes but you could also fill them with chocolates or use them as a hostess gift. This one here I made, is as per the instructions and uses the cute Great Friends stamp set which will be out very soon - August 1st - Spring mini.
I've also used some of the Patterns Designer Series Paper in Baja Breeze and Choc Chip.
Here's a close up so you can see in more detail the bellyband!
Once you have mastered this size, it is easy to adapt to another size if you wish. I hope you get to make one of these soon and let me know if you do.

Tuesday, 12 May 2009

Gift box with acetate

I have been wanting to get some clear acetate for a few stampin projects that I've always wanted to try out; and finally this week I did just that. Though I had to go to three different stationery stores before I found some. The last store I tried sold packs of 10 A3 sheets which was just perfect; now I have some to last me a little while.
So here's what I made: a gift box filled with chocolates! This box is similar to one of Makeesha's MIM tutorials, so if you would like some details you can have a look there. But I've just designed this one on my own with the lovely Rasberry Tart DP. The measurements are 20cm high and 5cm x 9cm for the width around.
For the tag I've used a Sale-a-bration set - this sentiment is perfect for this gift box. I've used the Scallop edge punch to make the corners and then used a brad and tafetta ribbon to tie onto the wide ribbon.
Now that I've made one of these, I know I'll def. be making some more very soon.
I've started working on a Convention Momento Box which will hold a mini album and other treasures from Convention. I've also used some acetate on this project as well, so I hope to share that with you all sometime soon.

Friday, 8 May 2009

Mothers Day gift wallet.

I always like the idea of gifts with a hand-made touch to them. So for Mothers Day this year, I've made a couple of these gift wallets with a belly band. They are so adorable in-real-life, so I wanted to share them here as well.
Here is a view of the wallet open. I've used Candy Lane DP, ribbon and Always stamp set.
I've cut a peice of 12x12 in half so it measures 12" x 6". Then along the longer side, I've scored 1" in, which folds up to make the pockets. Then I've scored at 4" intervals along the other side, to form the wallet.
So I've made three pockets into which I've put a gift card, a sachet of tea and a small note.

This is the wallet folded and with the belly-band. To make the belly band, I've cut a 2" x 12" piece of DP and wrapped around the wallet, so that it can slide on and off quite easily. I've finished off with some ribbon and the heart image from the Always stamp set.

And here's a close up of the heart. I've inked in Pink Pirouette and rolled the edges into Close to Cocoa ink. I've re-inked the heart image again, in Cocoa and stamped the little flower onto a small piece of white cardstock, punched out with circle punch, then attached a brad to the centre.

Well, these are off to be posted. They won't be in time for Mothers Day, but it will still be a nice suprise in their mail box early next week. (as long as they don't look here, which I'm quite sure that they don't very often, so I should be safe)
I'm making a 12x12 scrapbook page with the two stamp sets we got at Convention, Trendy Trees and Circle Circus; so I hope to share that with you soon.

Thursday, 5 February 2009

Love note card holder or gift box

I have been blog surfing and came across this cute little box which you can view here. I liked it so much, that I made one for myself. I'm not sure what the measurements and details were, so I've made a little tutorial of how I created mine. Enjoy!

For the box you will need:
1 x sheet of DP cut out at 5" x 7" (these are the only measurements I'll have in inches; the rest are in cm's)
Score from each side 4.5cm in.

Next you will need to cut at each side as shown in the picture below, to form the tabs for the box. I usually cut the width of the score line, so when you assemble the box, it comes together nicely.
Next you will need to bring each tab to the inside of the box and adhere. I've just used SU Snail adhesive for this. Your box should come together and look like this.

Now you are ready to make the cover for the box. For this you will need:
1 x coloured cardstock cut out at 12cm x 26cm
You will then need to score at 10.75cm and 15.25cm. This forms a 4.5cm spine, which is the depth of the box.

On each corner, I've used the scallop edge punch to create the scallop edge.

It should look like this!

On the inside of the cover, cut a length of ribbon and adhere to the cardstock, leaving a small length on each side to make a ribbon or knot.
At each end of the cover, I've set a jumbo eyelet with the Crop-o-dile and pulled the ribbon thru to the outside of the cover to finish it off neatly.

Here you can see the ribbon come thru to the outside of the cover.


Now you are ready to fix the box into the cover. I've put some double sided tape on the base of the box and the side that sits in the spine of the cover. I've used some stronger tape, as you don't want it to fall out.
Your box should sit nicely on top of the ribbon. Here's how it should look at this stage, with the lid open.


And here is the box closed with the ribbon pulled together. I've used a clip from the Hodgepodge hardware. But you could also tie a knot or bow.


You are now ready to decorate the top of the box, however you wish. I've kept it very simple and used some of the left-over cardstock and some felt flowers from my tin of Flower Fusion. I've also stamped the word 'happiness' from Warm Words.


Here's a little close up.


To complete this love note box, I've made up three little love notes from the left-over cardstock, lying all over my table, with some more felt flowers.
You could easily fill this box with small chocolates or some soap.

So there you have it. If you make one of the these, I'd love to see your creation. And if you have any questions about this project, please email me.
All images © Stampin'Up 1990-2009

Wednesday, 13 August 2008

Still creating, whilst waiting and anticipating..........

I made this little mini album today using some photo's from the other week, after Kyle's birthday, when we had a yummy breakfast at The Goose. It's always inspiring using recent photo's and creating fun little projects.
I've used only one 12x12 sheet of cardstock, scored and divided into three sections. The edge folds up, creating pockets into which I've added tags. I've also used a number of 'rub-on's which I just got in the mail today. I can see myself ordering more of these; they really complete a project. Anyway, this first photo is how it looks all opened up. Then follow more photo's of the tags etc.


Recipe:
Stamps: Always, Baroque Motifs (cherish sentiment)
Cardstock: Not quite Navy, Soft Sky, Wild Wasabi, Whisper White & DP Spring Silhouettes
Ink: Not quite Navy, Soft Sky, Wild Wasabi
Accessories: Rub-on's - Eastern Elegance (Spring mini), Styled Silver Hodgepodge, Ribbon, Corner rounder
All images © Stampin'Up 1990-2008

Friday, 18 July 2008

Box in a Bag

When I saw this 'Box in a Bag' on Carol's blog http://cardsmore.blogspot.com/ I knew I wanted to try it out for myself. Carol was kind enough to pass on the link to where I could find the tutorial. Let me tell you, it's a very cute little bag to make and looks even better in real life. A great little gift bag to fill with something sweet!!

So here's my creation. I've used DP from Fall Flowers with Blue Bayou cardstock. The stamped image is from True Friend.

Here is the link to the tutorial: http://dianagibbs.typepad.com/stampin_with_di/2008/06/box-in-a-bag-tutorial.html

The measurements are all inches so I'll list the cardstock required in cm and then you can follow the tutorial. It's very easy to work out and once assembled, you can decorate however you wish.

Materials you will need:

1 x cardstock 11.5cm x 11.5cm for box base
1 x Designer paper 14cm x 28cm for bag
1 x strip of cardstock 5cm x 28cm to create scallop edge.

You will need to score cardstock for box base at 2.5cm from each side.

Let me know if you give this one a go, I'd love to see what you come up with. And if you need any help, just leave a comment. Ok, I'm off to make some more.


All images © Stampin'Up 1990-2008

Thursday, 17 July 2008

Sneak Peak

A new mini catalogue for Stampin'Up is just around the corner. The Spring Mini is due to be released on August 1 and go thru to November 30. As a demonstrator, I get the opportunity to be one of the first to see all the new products by being able to pre-order for the month of July. This 'mini' is full of fun stamps, bright colours, new Designer papers, rub-on's and exciting accessories. If you would love to have a copy of the new Spring Mini, be sure to send me an email and I will mail a copy out to you. I have a nice pile ready for posting!!

So I thought I'd give you all a sneak peak at a few of the fun products that will be coming up.


This is a little project I was working on yesterday. The 'love notes' are such a fun size to work with; I've made my own this time - (cut cardstock to 15cm x 8cm and score in half) with a variation to the 'love notes box'. Tart & Tangy is the name of this stamp set and it will be a great little set to have for summer. It co-ordinates well with the Summer Picnic DP, as you can see above. And if you love your SU punches as I do, then it's a set for you as it works well with the circle and scallop punches as shown in the cards.
If you would like to make this little box, the template can be found here:

http://laurenstampercat.typepad.com/

If you scroll down a little way, you will see templates/patterns on left hand side of blog. From here you can open a file for this box. I have varied my box a little to suit my project!!

Stamp sets: Tart & Tangy (new spring mini), Family Phrases (sentiments), Cause for Celebration (flower on box)


All images © Stampin'Up 1990-2008

Saturday, 12 July 2008

Emerging Colour Technique

I've had the afternoon to myself, as Warren as taken the boys boat fishing. I know, you probably think, 'going fishing in this cold rainy weather'. But it's actually perfect weather for fishing - no wind, the sea is flat and the sun is shining. So I hope they are having fun and make a big catch!!
Anyway, I've been making a card. After doing lots of scrapbooking this week, a card was a nice change. Since seeing a few cards using the Emerging Colour Technique, I've always wanted to try it myself. After reading some tutorials and figuring it all out, I've made this card. Quite pleased with the end result. It looks hard, but once you give it a go, you will find it's quite easy to achieve.

Here are some basic steps for this technique:

1. On to Whisper White cardstock, stamp some images. I've chosen a few from the Priceless stamp set and stamped in Soft Sky, Regal Rose & Close to Cocoa.

2. Choose a solid stamp and ink up in Versamark. Stamp this image onto the Whisper White cardstock, over the top of the images you've already stamped. I've used the large flower stamp from Office Accourtrement.

3. Sprinkle clear embossing powder over Versamark image and then heat-set with heat gun.

4. Next, with your brayer and a coloured ink pad, roll ink over the entire image done in Versamark. I've used Purely Pomegrante as it makes the image stand out. Then you can cut around the edges of your flower, ready to assemble onto your card.

I hope this makes sense. If you have any questions, leave a comment so I can help you out.

Card Recipe:
Stamp set: Priceless, Short & Sweet, Office Accourtrement
Cardstock: Purely Pomegrante, Close to Cocoa, Sky Blue, Whisper White
Ink: Purely Pomegrante, Close to Cocoa, Sky Blue
Accessories: Ribbon, White gel pen, Word window punch, Silver brad, Dimensionals.

All images © Stampin'Up 1990-2008

Thursday, 26 June 2008

Mass production with Designer papers

I promised you more cards using the 'Unforgettable' stamp set. Well, I've done just that, though the frogs are no where to be seen!!

With these cards, I'm showing how easy it is to mass produce your cards using Designer paper from Stampin' Up, single image stamps and smaller stamps to make your own background paper.
* Each card is the same design.
* Divided into three sections, each card has three different patterned papers.
* The bottom and second strips of paper are Designer Papers, co-ordinating from the same pack.
* The Designer papers are double-sided, so I've picked a pattern that I like, then simply turn it over to get another pattern.
* The top strip is Whisper White with an image stamped over to make it your own patterned paper.
* I've used the dragonfly and snail image from the 'Unforgettable' stamp set. These are simple little images which can be coloured in and then matted onto circle or square cardstock.
* Cards have been finished off with ribbon and a sentiment

Using this method, you are able to produce simple but effective cards; and it's very easy to mass produce. The Designer paper packs from Stampin'Up make is easy to co-ordinate all your colours. And it's amazing how you can put so many different patterns together. I wouldn't normally make cards using so many patterns, but this was a fun project to do and even more pleasing when you see how many cards you can come up with in a short amount of time.


Designer Paper Fall Flowers, flower stamp on top strip is from Polka Dots & Petals.
Designer Paper Berry Bliss, circle stamp on top strip is from Pick a Petal. The circle on which the dragon fly is stamped, has been clear embossed.
Designer Paper Spring Break, stamp on top strip is from Polka Dots & Petals. The snail has Dimensional Magic on it.
Designer Paper Loves Me (previous catalogue), stamp on top strip is from Polka Dots & Petals. On the square cardstock with snail image, I've used the Heat & Stick powder with glitter.

All the sentiments are from So Many Sayings (hostess set)

All images © Stampin'Up 1990-2008

I hope I've inspired you all and given you some simple idea's on how easy it is to mass produce your cards, especially with the Designer paper and a few stamps.

Saturday, 7 June 2008

Note card holder

Ok, so here is the note card holder I've been busy with. So pleased with the end result - was fun and easy to make. Firstly, my inspiration and direction came from this website:
http://danniesdesigns.typepad.com/my_weblog/2008/06/note-card-holde.html
Certainly go and have a look at this tutorial to understand how the project is made. I have followed the general idea, just adapting some measurements to suit, as I find our measurements differ from the US!! So I will give you my measurements if you wish to make one of these yourself.

You will need:
Note card holder - 1 x A4 cardstock
I've scored at 4cm with cardstock in landscape position and at 14.5cm & 15.5cm with cardstock in vertical position.
The 4cm is for where the notes/envelopes will sit inside holder, once the cardstock is folded up.
The 14.5cm & 15.5cm is the spine of the holder

Fold all scored lines and cut as directed(refer to tutorial link)
You will notice in the picture below, I've fastened the cardstock together with eyelets on each side. Another alternative to using tape and I found it helped the notes to sit nice and snug. Since having the Crop-o-dile, I'm using eyelets alot more.

The front and back of holder have been finished off with cardstock and DP.
These are my measurements:
Cardstock - 13cm x 16cm
Designer Paper - 12.5cm x 15.5cm


This is how the note holder looks when opened up - one side for notes and one side for envelopes.
For this note holder, I've made a set of five notes (pictured above)

I've used mostly Boho Backgrounds stamp set and Outlaw DP. Colours in this theme are: Choc Chip, Creamy Caramel, Really Rust, Sage Shadow and Very Vanilla. I would never have put these colours together, before Stampin'Up came up with the Boho West theme. I just love it now!!


The end result - 5 notes with matching envelopes and their own matching holder. A perfect gift.
The notes measure 10cm x 15cm with standard C6 envelopes
All images Copyright Stampin'Up 1990-2008


Wednesday, 30 April 2008

Scallop flower!!

Here's another decorated envelope for my card case. I wanted to show you the flower embellishment that I've made for the front of the envelope and how this can be made using the SU Scallop punch.

Here are the tools you will need:
* SU Scallop punch
* SU 3-flower punch
* snips
* pencil
* ruler
I've punched out from Rose Red cardstock, a scallop punch shape.

Next, with ruler and pencil, I've drawn lines as shown in the photo.
With my SU snips, I've cut along each line, but not quite to the middle. The photo will show you how each segment is seperate. From here you can punch some more flowers to adhere to this flower as I've done in my card, or you can decorate as you please. I've also secured the flowers with a brad and sponged the edges with the Rose Red ink pad. I'm sure it will work well with all kinds of paper; give it a go!!
All images Copyright Stampin'Up 2008

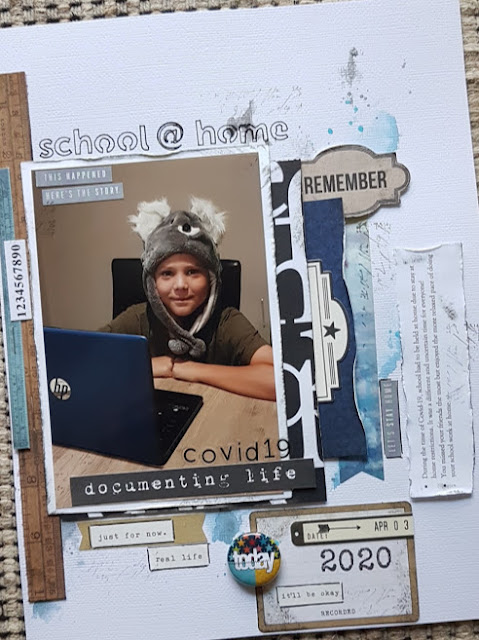
school @ home

Hello, I definitely wanted to record this little moment!  School @ home due to stay at home restrictions because of COVID-19.  It was certai...