Showing posts with label Be Inspired To Create. Show all posts

Monday, 24 November 2008

Be Inspired to Create #5

I've been having lots of fun using my own inspiration pictures to create, so much so, I'm up to #5. I've gone with Pumpkin Patch colours again, some cute little t-shirts from Caden. So the colours I'm working with are: Taken with Teal, Soft Sky, Ruby Red & Sahara Sand.


My first project is a 8x8 scrapbook page using a photo of my gorgeous son sleeping (photo taken by my sister Aimee).
The base is Soft Sky onto which I've used the Stampin' round wheel with Nursery Letters and also some stars from Nursery Necessities. I've added some strips of cardstock in the Teal, Red and Sahara Sand to imitate the stripes in the t-shirt! The dotted DP is from a new pack of paper in the Summer mini and it just happened to co-ordinate perfectly for this layout. The star images and sentiment are all from Nursery Necessities. And I've finished it off with a rub-on - Eastern Elegance (Spring Mini) and some striped ribbon in the Soft Sky.


Next, I've made up two love note cards. These cards are such a cute size to make and when you've got the colours and stamp pads already on your desk, it's a great way to use up the left-overs. The stamp set used here is True Friend from the Spring Mini. You only have one more week to order from this mini catalogue.


And the second love note card uses a set from the new Summer mini. I really love this flower image and can see myself using it alot. Next week, I can share with you the details about this stamp set and all the other great sets in the new mini catalogue!
I've stamped the flower onto watercolour paper and use the Ruby Red marker pen and aqua painter to colour in. Then I've run some Dimensional Magic around the edges and dusted with sparkling glitter and added a half pearl in the centre.


And for my last project, I've made a landscape card using another set from the Spring Mini. The stamp set is Enjoy Every Moment, which is a great set for scrapbooking but also for cards. I've used the Teal and Red marker pens to ink up the letters on 'Enjoy' and stamped onto Whisper White. Just one of the many techniques you can do with SU marker pens - don't forget about the wonderful promotion on at the moment where you can buy the marker pens SINGLE.
Once again, I've gone with the striped look and layered strips of cardstock and DP to create the background. The three flower images have been stamped onto White and punched out, then layered onto the same colour cardstock. The little coloured gems are non-SU but I thought they finished off the card nicely.


All images © Stampin'Up 1990-2008
As I mentioned before, the Spring mini is about to end; you only have a few more days to order and then these stamps sets will not be available anymore. On Dec 1st, we will have the new Summer mini to enjoy. If you would like more details, please email me chuizeng@bigpond.net.au
For those wanting to place an order from the Spring Mini, I have a special last week offer. Please email for details!!
If you wonder why I make more than one project, well the answer is: I usually start of creating the scrapbook layout, so by the time I've completed that, my desk is covered in cardstock, ink and stamp sets, so it is easy to whip up cards and other projects at the same time!! I find once I've started, I get on a roll and am having so much fun with the colours, that I just want to keep going with it. You should know by now, stamping is addictive!!
So in saying that; I'd love to see what you come up with. Leave me a comment if you play along!! Til next time...


Monday, 17 November 2008

Be Inspired to Create #4

Hope you are all well on this Monday morning. I have for you Inspiration #4. Had lots of fun with this one as I thought the colours were just so nice together. My inspiration was from a little all-in-one suit, a present for Caden. (thanks Keesh). I just love the colours Pumpkin Patch has for this season. And some of the pictures are so similiar to SU stamps!! So the colours I'm using are: Ruby Red, So Saffron, Going Grey & Basic Grey.


This card has a Going Grey base onto which I've layered Saffron cardstock. On this piece, I've stamped up the Tres Chic BG stamp onto a part of the cardstock. Then I've used the cute elephant and giraffe images from Wild about You and made some circles using my CM cutter. The 'love' sentiment is from the Tres Chic BG stamp - I've stamped onto some White cardstock and used the SU circle punches to cut out the word. The card has been completed with taffeta ribbon and some bling brads.

This next card is a cute little square one and I've used an oldie but a goodie - Loads of Love. The car image is great for paper piecing, which is what I've done. The car image has been stamped onto White cardstock and also some So Saffron DP. I've then cut out and pasted onto the white cardstock. I've used my ink pads and aqua painter to colour in the hearts and car wheels. Too cute!!


With so much cardstock and accessories spread out over my craft table, I thought I would quickly make up this scrapbook page. The colours in the photo were perfect for this round.
So the base is Basic Grey to which I've added some strips of Red & Going Grey. I've roughed up the edges using the distressing tool. The red cardstock has stars stamped all across and then I've done paper piercing along the bottom and top of the strips of paper. I've used some more of the So Saffron DP with spots. The star image is from Nursery Necessities - stamped onto White cardstock then mounted onto grey and cut out. The 'Wonderful Brother' is from the Wonderful Favourites stamp set.
All images © Stampin'Up 1990-2008
So these are my projects. I'd love to see what you can come up with using these colours together. Leave a comment so I can see. Til next time.....


Wednesday, 12 November 2008

Be Inspired to Create #3

Be Inspired to Create #3 - Colours are: Old Olive, Orchid Opulence & Pixie Pink.
I have to say I have never even used Orchid Oppulence, I don't even have the ink pad!! WOW.
So these are the three colours I've chosen from my inspiration photo - a lovely orchid I received as a gift. Isn't is just beautiful.
The first is a square card using the bird image from Always. I've ink the bird in the Pixie Pink, then stamped it off once. Then I've used my marker pens to 'thump' some colour onto the bird. I've cut this out using my CM cutters. The circle has been matted onto the Orchid cardstock which has a stamp from the same set in the Versamark, then the olive, with a pink base. The happiness sentiment is from Warm Words and I've finished off the card with some grosgrain ribbon.
Next is a scrapbook page, 8x8 in size. I've used the beautiful flower image from Fabulous Flowers. I've stamped this three times onto white cardstock and then cut out to form layers. The sentiment 'dare to be fabulous' has been done using the SU markers by applying the ink directly to the stamp, resulting in the two different colours.

And lastly, I've made a gift box. This is from a tutorial that Makeesha has made for her 'Make it Mondays'. I look at them every week and always say, 'I'd love to make that'. They are fabulous projects.
So the base of the box is Old Olive cardstock and the top is DP from Petals & Paisley. I couldn't bring myself to wrap so much wide grosgrain around the box, so I've made a band for the top of the box with a gift tag. Here is a close up of the tag. The flower is from Fabulous Flowers.


So there you have it, my three projects using this different colour combination. They worked quite well together and I may have to use Orchid Opulence more often! Leave me a comment if you create something with these colours; I'd love to see.
Sarah and Monique both played along with #2, so check out their blogs to see their lovely cards. The links are in the side bar.
Til next time...
All images © Stampin'Up 1990-2008


Monday, 3 November 2008

Be Inspired To Create #2

Here we are again, Monday morning and another lot of projects to show you. Isn't this monkey sooo very cute. He was a gift to Caden from his Auntie Renae. I love these colours so much and they did remind me of the Spring Break Designer Paper. So the colours I've chosen to work with in this round are: Not Quite Navy, Old Olive, Pumpkin Pie & Soft Sky

The first card uses one of my favourite stamp sets, Fishy Friends. I love stamping the images on the watercolour paper and using my marker pens to colour in. It always gives a good result. I've used my Creative Memories cutter to create the circles. The smile sentiment is from Be Happy, which I've matted onto some Pumpkin Pie DP. It's a simple card, but I love the different layers and combining square and circle cardstock. The base has been stamped with the Linen BG stamp, but the photo does not pick that up. I've finished off the card with some striped ribbon, brads and the spiral punch on the top left-hand corner.

This second card uses the Big Bold Birthday stamp set. This stamp set is still new to me, so it's slowly seeing some ink and I'm loving it. The base is Old Olive, then some DP from Spring Break, then a strip of Soft Sky with some paper piercing. I've stamped the cupcake onto Whisper White and then the icing has been cut out and raised with dimensionals. After matting onto more cardstock, I've used the slit punch for where the card can sit.


Lastly I've done a scrapbook page with a photo of my beautiful son Kyle. This photo was taken by my sister Aimee, whilst he was totally unaware. That's what I like about it; a true relection of him in a moment of his own!!
This is the DP that resembles the stripes on the monkey. I've used the Wonderful Favourites set and Always (from Spring Mini). With the heart image, I've stamped in Soft Sky onto Whisper White and then matted onto Not Quite Navy and then cut out, so it has a border. I've used some Old Olive wide grosgrain with the HodgePodge hardware and made a little word tag using Every Expressive Phrases.
So these are my projects using these fabulous colours. I do have to admit that these are my kind of colours, so I found it quite easy to work with. But I do have some Inspiration pictures coming soon, where some of the colours are probably not my favourite, so that's going to be interesting to see what I can come up with.
Once again, if you would like to create something with these colours, leave me a comment so I can see what you've made.
Sarah joined in with last weeks colours and made a very nice card using one of my favourite stamp sets (which I should use more). Her card is here: http://brucensarah.blogspot.com/2008/10/same-card-different-colours.html
Have fun and happy stampin'


Monday, 27 October 2008

Be Inspired To Create #1

Here is my very first 'Be Inspired to Create'. So what's it all about?? I love taking photo's, so I thought, why not take pictures from around my home and use them for inspiration. And that's what I've done. So you get to see bits of my home and things I love and also how I use that as inspiration to create.
For my first one I've take a picture of some beautiful hand cream and shower gel which I received as a gift when I had Caden. It smells sooooo good. And the colours I've chosen are:
Purely Pomegrante, Regal Rose, Pretty in Pink & Certain Celery.
I've started off with an 8x8 scrapbook page of my gorgeous neice Amber. The base is Regal Rose, then a square of DP from Berry Bliss. The photo is matted onto Pomegrante. The chipboard letter 'd' has been covered in DP in Certain Celery with the paisley print and I've inked around the edges. I've used the 'Lifes Definitions' stamp set for the 'delight' sentiment and completed that with brackets made using the tab punch. I've also used my photo corner punch and the circle and scallop punches to make the embellishments. The page is completed with some Pomegrante stitched ribbon and brads.
Next is a card using the 'Priceless' stamp set. I've stamped onto the base card of Celery and then gone along with my glue pen and glitter. Looks nice and sparkly IRL. Next is a strip of pomegrante and regal rose onto which I've stamped some flowers in rose ink. I've created a tag and cut out the heart image to sit on the tag and finished off with some pink taffeta ribbon. The sentiment has been punched out with the oval punch and then matted onto the label punch out.
The layout of the card is really simple and works everytime.

Lastly I've made a little 'love note' card using the same stamp set. I just love the SU punches and how they make it so quick and easy to create. I've stamped the butterfly image twice onto white card stock and then cut out the second image so I could layer it. That sits on the scallop punch out which I've also paper pierced. I've added a strip of Celery DP and also paper pierced under that. And the card is completed with the Pink grosgrain ribbon. The happy birthday sentiment is from Family Favourites.


So there you have it, three projects using these very pretty colours. And by starting off with a scrapbook page, you will have cardstock left over to create the cards. It's a great way to use up the left over bits and pieces and create some cards for your stash.
If you want to use this colour inspiration for your own, leave a link with your comment. I'd love to see what you create as well. I'm hoping to be able to share these colour inspirations with you weekly. So stay tuned for the next one!!
All images © Stampin'Up 1990-2008

school @ home

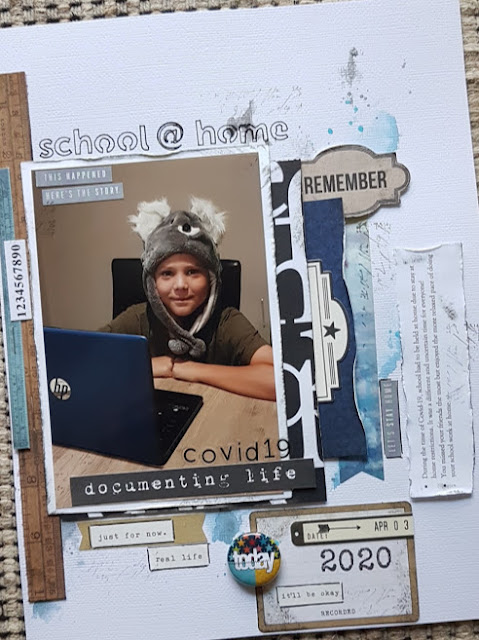
Hello, I definitely wanted to record this little moment!  School @ home due to stay at home restrictions because of COVID-19.  It was certai...