Hello there! It's been a while since I've created anything on canvas - I was cleaning thru my craft supplies and re-organising 'stuff', finding hidden treasures and inspired by my supplies ........................... so I got about creating and came up with this piece ☺ I'm so happy with how it's turned out - it's reminded me that I love doing this form of art and I want to keep creating and painting!
I've used suppies from Prima, Kaisercraft and chipboard pieces from Your Creative Wings. I love these colours and it looks so lovely in my craft room.
Here are some close-up's:
Prima always have the most beautiful flowers!
There's plenty of texture with stencil work and chipboard.
I have a few more idea's of some canvas pieces I'd like to make - hope to be back soon to share.
Thanks for coming by ♥
Showing posts with label Canvas art. Show all posts
Thursday, 10 March 2016
Wednesday, 10 September 2014
canvas art - she was a modern girl with a vintage soul
Hello ☺ I've been doing a little bit more canvas art and thought I'd share this cute piece with you all.
I recently purchased a book called Vantastic by Kate Ulman from the Fox Lane blog.
A beautiful book all about their travels in a caravan!! I was inspired by the cover to create a canvas with a retro caravan as the theme ................. and I just love how it turned out.
Lots and lots of layers of paper, dressing making pattern paper and paint.
I found this cute little quote and felt it suited the canvas and also says a little bit about me ☺
So this little canvas sits proudly in my home and makes me long for another camping holiday ................................
Thanks for coming by.
Creating with love + happiness ♥
I recently purchased a book called Vantastic by Kate Ulman from the Fox Lane blog.
A beautiful book all about their travels in a caravan!! I was inspired by the cover to create a canvas with a retro caravan as the theme ................. and I just love how it turned out.
Lots and lots of layers of paper, dressing making pattern paper and paint.
I found this cute little quote and felt it suited the canvas and also says a little bit about me ☺
So this little canvas sits proudly in my home and makes me long for another camping holiday ................................
Thanks for coming by.
Creating with love + happiness ♥
Thursday, 28 August 2014
canvas art - life is beautiful
Hello there ☺
I've been getting all creative with paint, paper and canvas. Today I'm sharing a recent canvas! I'm teaching this one at my kids school - so I took a few photo's to share here!
It's an 8x8" canvas - I've done a few layers here with paper, dressmaking paper, modelling paste and paint.
Here is the cute little owl which is the main design on my canvas. I've paper pieced it on to the canvas and added in details of rub-on's, stamping and black pen.
Adding in the little details is always the fun part ..... a cute little wooden heart and a little bit of bling ☺
a few words added in ......................................
................. and here it is all complete!
Mixed media is a lot of fun - I have a feeling I'm going to be doing a few more of these as time allows ☺
Thanks for coming by.
Creating with love + happiness ♥
I've been getting all creative with paint, paper and canvas. Today I'm sharing a recent canvas! I'm teaching this one at my kids school - so I took a few photo's to share here!
It's an 8x8" canvas - I've done a few layers here with paper, dressmaking paper, modelling paste and paint.
Here is the cute little owl which is the main design on my canvas. I've paper pieced it on to the canvas and added in details of rub-on's, stamping and black pen.
Adding in the little details is always the fun part ..... a cute little wooden heart and a little bit of bling ☺
a few words added in ......................................
................. and here it is all complete!
Mixed media is a lot of fun - I have a feeling I'm going to be doing a few more of these as time allows ☺
Thanks for coming by.
Creating with love + happiness ♥
Saturday, 22 June 2013
Strong - Authentique - The Scrapbook Store
It's a cold Winters day, perfect for being inside and catching up on blogging!! I just wanted to share with you a canvas I made using up some of the left-over bits in my kit from The Scrapbook Store. I've been working with the 'Strong' collection by Authentique ☺
This canvas uses some of the pattern papers in this collection, some Prima, chipboard, Prima pegs, lots of Silks Acrylic Glaze and a few other bits and pieces in my stash.
My canvas started by adding layers of pattern paper to create the background. I've swiped over some areas with the Yellow Rose Glaze - this colour goes more towards a mustard shade of yellow, so it's not too bright ☺
Here are some close-up's:
I've made use of some Prima packaging and added it in as a tag behind the photo. The chipboard title has been painted with the Yellow Rose glaze. There's a lot of background action - painting with bubble wrap, using a chevron stencil and fun little sequins.
The Prima pegs are from the Lady Bird collection and they fit in well with my colour scheme. I've also used some Prima blooms.
Behind the photo I've made up some tags using some lined cardstock - these have been given a light coat of water and the Yellow Rose Glaze - i've also used the Glaze to do some stamping and splatters - these little pots of paint are so versatile!!
This balloon chipboard is from 2 Crafty Chipboard - I've used Silks Acrylic Glaze in Silver Bells to give it some colour - with some stamping, ink, a Prima bloom and flair badge, the balloon has become an embellishment for my canvas!! I've used some chevron washi tape along the edges.
I have used lots of different stamps, mediums and embellishments - if you have any questions please leave them in the comments ☺
I hope you've enjoyed my inspiration for the Strong collection by Authentique - it's available in store as well as lots of other wonderful products. Don't forget about the EOFY sale - lots of items reduced - check them out today ☺
Enjoy your weekend ♥
My canvas started by adding layers of pattern paper to create the background. I've swiped over some areas with the Yellow Rose Glaze - this colour goes more towards a mustard shade of yellow, so it's not too bright ☺
Here are some close-up's:
I've made use of some Prima packaging and added it in as a tag behind the photo. The chipboard title has been painted with the Yellow Rose glaze. There's a lot of background action - painting with bubble wrap, using a chevron stencil and fun little sequins.
The Prima pegs are from the Lady Bird collection and they fit in well with my colour scheme. I've also used some Prima blooms.
Behind the photo I've made up some tags using some lined cardstock - these have been given a light coat of water and the Yellow Rose Glaze - i've also used the Glaze to do some stamping and splatters - these little pots of paint are so versatile!!
This balloon chipboard is from 2 Crafty Chipboard - I've used Silks Acrylic Glaze in Silver Bells to give it some colour - with some stamping, ink, a Prima bloom and flair badge, the balloon has become an embellishment for my canvas!! I've used some chevron washi tape along the edges.
I have used lots of different stamps, mediums and embellishments - if you have any questions please leave them in the comments ☺
I hope you've enjoyed my inspiration for the Strong collection by Authentique - it's available in store as well as lots of other wonderful products. Don't forget about the EOFY sale - lots of items reduced - check them out today ☺
Enjoy your weekend ♥
Thursday, 11 October 2012
you are blessed
Hello - the school holidays are coming to an end - we've been enjoying some family time away, travelling and camping - it's been great and lots of fun ☺
I'm here to share my inspiration for the latest challenge at ARTastic - this month I'm hosting the challenge and it's all about 'handmade flowers' - inspired by this painting by Liza Posar.

... and here's what I've come up with - a canvas!! I've also made up a tutorial on how I created this canvas which you can view on the ARTastic blog
Thanks for coming by ☺
Wednesday, 28 September 2011
create
... a small canvas that I created for my new crafting space ... it uses fabric squares and pattern paper, rub-on's, paints, stamps and flowers...
... as well as this cute little chipboard birdcage from Stuff 2 Scrap ...
... thanks for coming by and for all your lovely comments ...
... as well as this cute little chipboard birdcage from Stuff 2 Scrap ...
... thanks for coming by and for all your lovely comments ...
Thursday, 1 April 2010
E is for Eamon
Now that this sweet canvas has safely reached the other side of Australia I can show you my latest little creations for my newest nephew Eamon - a bundle of joy for my sister and her hubby.
I've combined fabric, co-ordinating buttons made by me, chipboard, lace and a hand-made owl - by me too!
I've kept is simple - didn't want to take anything away from this sweet picture. I can't wait to meet this cute little guy very soon.
Wednesday, 10 February 2010
Canvas art.
I promised I would share my canvas art. Today I finished it off! I am really pleased with it - I've used bits of treasures that I love, a photo that was always one of my favourites and it will find a happy place on a wall in our house.
I painted the whole canvas a creamy colour and also sponged the top half. Along the bottom I've used Sahara Sand ink with the En Francais BG stamp from Stampin'Up.
I've used some of my favourite lace, pattern paper from the Nook and Pantry range by Basic Grey - can you see the lace doily pattern on the paper? Then there is some fabric with the roses, hessian and some of the ruffled paper flowers with button centres. You can refer to this post to see the details on where you can view the tutorial for these kinds of flowers.
This photo was taken on holidays a few years back - bird on a washing line wire.
Thanks for poping past!
Tuesday, 9 February 2010
Tid-bits of craft!
No cards to show, but I have some crafty bits to share. I recently made a purchase from an Etsy store - beautiful twine in chocolate and white and some gorgeous paper lace doilys - they really are pretty. I got these items from Nice Package - Creative Gift Packaging Solutions.
Today I went to a local op-shop to see if I could get more vintage lace doily tableclothes and fabric. I found a few treasures and I plan to be doing alot of cutting and creating in the next week. Check back soon....
And currently I'm working on some more canvas art. I did a smaller one last year and it was alot of fun. Here's just a little peek - I will show you the finished result very soon. I'm happy about this one!
Wednesday, 14 October 2009
Canvas scrapbooking
This is a little project I've been creating in the past few days. For my love of fabric, buttons, felt and paper - I've combined them all with some stampin' inbetween.
This photo of my adorable Caden was taken by my sister Aimee and has been enlarged to a 5x7. I've made a collage effect of various cardstock, fabric, hemp and ribbon.
For the embellishments, I've used the sweet Forest Friends stamp set. I've inked up the tree and stamped directly onto the fabric, then placed a button in the centre, tied off with twine.
The tag is recycled from some clothing; I've cut a piece of felt for the heart image and added a few coloured buttons. Then I've stamped up the little bunny image in Close to Cocoa onto Vanilla cardstock, cut out, then mounted onto the felt. I've used some Celery ribbon to finish off the tag. Here's a closer look at the embellisment.

Well, this was so much fun and I really enjoyed working on the canvas with some different mediums. I love combining stamping with fabric and seeing how they come together. This peice of art will make a lovely display that I'm very pleased with!
For the embellishments, I've used the sweet Forest Friends stamp set. I've inked up the tree and stamped directly onto the fabric, then placed a button in the centre, tied off with twine.
The tag is recycled from some clothing; I've cut a piece of felt for the heart image and added a few coloured buttons. Then I've stamped up the little bunny image in Close to Cocoa onto Vanilla cardstock, cut out, then mounted onto the felt. I've used some Celery ribbon to finish off the tag. Here's a closer look at the embellisment.
Well, this was so much fun and I really enjoyed working on the canvas with some different mediums. I love combining stamping with fabric and seeing how they come together. This peice of art will make a lovely display that I'm very pleased with!
Subscribe to:
Posts (Atom)
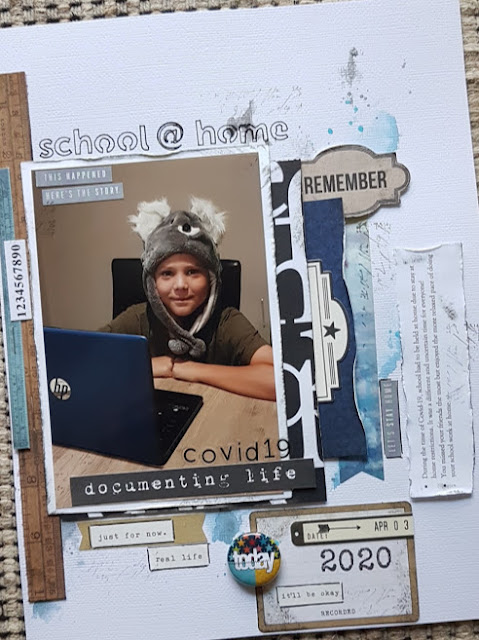
school @ home
Hello, I definitely wanted to record this little moment! School @ home due to stay at home restrictions because of COVID-19. It was certai...
-
Sorry, this post is a little late, but here it goes for the blog hop....... Hello there Magnolia Lovers and Welcome to the 1st Birthday Bl...
-
IT'S GIVE AWAY TIME. ... to coincide with my Creative Bits clearance sale , I'm also having a give away. * a pile of coloured do...
-
If you have arrived here because you are hopping along with the Stuck?! Sketches blog hop, welcome! One lucky winner from those hopping will...


