Friday, 30 October 2009
Inkspiration Sketch Challenge #15
Friday, 23 October 2009
Inkspiration Inspiration Challenge #14
It's time for another fabulous Inspiration Challenge and Makeesha has picked out this gorgeous bedding to help you get inspired. It looks so beachy and summery, don't you think!
So I've started with a base card in Whisper White, then layered various cardstocks in Bashful Blue, Taken with Teal, Certain Celery and Basic Grey, to imitate the quilt cover pattern. I've used the Sprinkles stamp set on the Teal and Blue strips.
For the main image, I've used Just Beachy, and picked out the beach thongs. I've inked up in Stazon Black, stamped onto some watercolour paper and then used the Aqua painter and ink pads to colour them in. I've added a small rhinestone to the pair in the middle.
Then I've added some wide Celery ribbon, tied in a knot. The sentiment has been stamped in Teal and I've used the Window punch and a small rhinestone to complete it.
If you would love to join in with the challenge, pop over to Makeesha's website to get all the details and also see her fabulous creation.
And then you can take a tour with some more fabulous creations from her Design Team:
Sarah-Jane
Kirsty
Amy
Cindy
Renee
Have fun with this one.
Product used:
Stamps: Just Beachy, Sprinkles
Cardstock: Whisper White, Taken with Teal, Certain Celery, Bashful Blue, Basic Grey, watercolour cardstock
Ink: Bashful Blue, Taken with Teal, Stazon Black
Others: Grograin ribbon, rhinestone, Window punch
Thursday, 22 October 2009
All things pretty
I've used my little craft sewing machine to add some stitching across the top of the layout. Though it didn't really co-operate with the layers, so it does have a rather messy look!!
I've added the large flower embellisment next to the photo and also used the Trio Flower punch to make up three smaller flowers for brads in the centre.
Well let me know what you think of my fabric scrapbooking. There's something about having texture on a page and I love to explore the various styles in my scrapbooking world.
This will be my last post for a week or so, though I do have a few scheduled posts for the DT challenges. We are going on holidays with the boys and I'm really looking forward to this special treat; to just relax and have some fun in the sun. So til next time....
Product used:
Stamps: Tidy Alphabet (retired)
Cardstock: Riding Hood Red, Mellow Moss, Kraft, White copy paper
Ink: Riding Hood Red
Others: Sprial punch, Trio Flower punch, fabric flower, brads, fabric, lace, dimensionals.
Wednesday, 21 October 2009
To be inspired...............
The flower image is from a hostess stamp set of last years catalogue - Oh So Lovely. These are such elegant images and fun to colour-in. I've used the Best Yet (hostess set) for the sentiment .
The eyelet border punch has been used along the bottom and I think it really suits the style of this card - that being 'elegantly vintage'.
I had some lace ribbon in my stash so I've used this with a Kiwi Kiss button to finish off the card.
I'm so pleased with this card. It's not often that I CASE a card - most of the time, they don't quite work out how I planned. So thank you Lee-Anne for your inspiration.
Product used:
Stamps: Oh So Lovely, Best Yet
Cardstock: Bordering Blue, Kiwi Kiss, Very Vanilla, DP Urban Garden
Ink: Stazon Black, Bordering Blue, Kiwi Kiss
Others: Top-Note die-cut, lace, button, circle punches, eyelet border punch, sponging
Mojo Monday Sketch #109
Well, this was a fun sketch and I would love to use it again, maybe for some scrapbooking.
Product used:
Stamps: Friends 24-7
Cardstock: Tempting Turquoise, Riding Hood Red, Regal Rose, Whisper White, DP Riding Hood Red
Ink: Riding Hood Red, Sahara Sand, Tempting Turquoise
Others: Cutter kit for distressing, circle punches, scallop punch, grograin ribbon, twine, button dimensionals, sponging.
Tuesday, 20 October 2009
Pre-loved stamps - updated list.
I've just updated my list of pre-loved stamps that I have for sale.
Click here to view list
I also have a link on the side-bar which remains there on an on-going basis.
Thank you
Monday, 19 October 2009
Sweet Sunday Sketch #40
Friday, 16 October 2009
Inkspiration Colour Challenge #14
 And here's my creation:
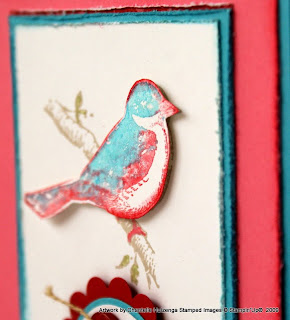
I've used the Friends 24-7 stamp set; one of my favourites. And today I chose to use the beautiful flower image from this set.
Then I've finished off my card with some ribbon that I had in my stash and some small pink rhinestones.
 Well, I had fun with these colours - they lend themselves to the elegant side, I think - soft and pretty. If you would love to join in with this weeks challenge, head over to Makeesha's Inkspiration Challenges and you will find all the details as well as her own creation using these colours.
Kirsty
Amy
Cindy
Renee
Have fun with this one and enjoy the weekend. Til next time
Product used:
Wednesday, 14 October 2009
Canvas scrapbooking
 This photo of my adorable Caden was taken by my sister Aimee and has been enlarged to a 5x7. I've made a collage effect of various cardstock, fabric, hemp and ribbon.
For the embellishments, I've used the sweet Forest Friends stamp set. I've inked up the tree and stamped directly onto the fabric, then placed a button in the centre, tied off with twine.
The tag is recycled from some clothing; I've cut a piece of felt for the heart image and added a few coloured buttons. Then I've stamped up the little bunny image in Close to Cocoa onto Vanilla cardstock, cut out, then mounted onto the felt. I've used some Celery ribbon to finish off the tag. Here's a closer look at the embellisment.

Well, this was so much fun and I really enjoyed working on the canvas with some different mediums. I love combining stamping with fabric and seeing how they come together. This peice of art will make a lovely display that I'm very pleased with!
Scrapping with buttons and paper flowers.
 I wanted to use bright colours for this one, so I went with the Pink Flamingo DP and teamed it up with Riding Hood Red, Tempting Turquoise and Regal Rose. Very bright and cheery.
There's not alot of stamping on this layout - I've used the Tres Chic BG stamp on the Turquoise cardstock - I love all the words on this stamp and it makes a great background. Using various punches and Designer paper, I've made a flower which has been crumpled to give a textured look. I've added another one up the top with the little sentiment ' love you much ' from Family Phrases. The I've finished off with some buttons and striped ribbon.
There's alot of texture and dimension in this page - a photo never does justice - but here's a closer look at the flower

Product used:
Stamps: Tres Chic, Famiy Phrases
Cardstock: Riding Hood Red, Tempting Turquoise, Regal Rose, DP Pink Flamingo, white copy paper
Ink: Tempting Turquoise, Riding Hood Red
Others: Buttons, Ribbon (non SU) SU punches, brads, Spiral punch
Tuesday, 13 October 2009
Scrapbooking with Sketch #14

So I've started off with a base in Kiwi Kiss and used the Sprinkles stamp set to create the background. Then I've layered some Rose Red and Regal Rose cardstock as per the sketch and then added the picture. I've used a strip of DP from Rasberry Tart, added some cute little butterfly images, some flowers and pearls from the Pretties Kit and a word from Life's Definitions. I've chosen the word 'favourite' as I know that the playground is one of Amber's favourite places to be.
Here's a closer look at the details:
I have a few things I'm working on; I hope to share them with you soon. Til next time.....
Product used:
Stamp set: Sprinkles, Lifes Definitions, butterfly images (non-SU)
Cardstock: Kiwi Kiss, Regal Rose, Rose Red, DP Rasberry Tart
Ink: Kiwi Kiss, Rose Red, Regal Rose
Others: Pretties Kit, Dimensionals
Friday, 9 October 2009
Inkspiration Sketch Challenge #14
 Here's my creation:
 I've teamed up Forest Friends stamp set with Sweet Always Designer Paper. These colours work well together and seeing as this card is for a sweet little girl - it's a perfect combination.
Curtain Call Colour Challenge #5
 So here's my creation:
 I've started with a base card in Lavender Lace, then added layers of Turquoise and Pumpkin Pie. Then with a piece of Whisper White, I've used the Organic Outlines stamp set, both images inked up in the Lavender Lace ink.
Thursday, 8 October 2009
Everything......
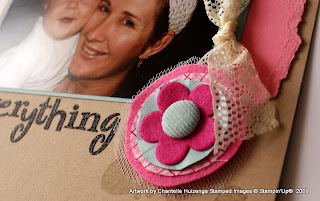
 This is another page to add to my little Caden's album. He's about five months old here and giving me the sweetest hug. It's not often we get to have our picture taken together.
I've used Kraft cardstock as the base and stamped the leaf image from Organic Outlines in Sahara Sand ink. I've matted the photo onto Regal Rose and Baja Breeze cardstock, tearing along one side. Then I've tied some pretty lace from my stash and added one of my handmade flowers made with peices of fabric and felt. A corduroy brad in Baja Breeze has pinned it all together.
The letters are also from my stash - and the wording at the bottom on the layout is the from Always stamp set.
Here's a closer look at the flower details - aren't they just the cutest!
 So another page done and more fun with fabric and felt. I'll be back tommorow with some inspiration for Makeesha's weekly challenge. Til then.
Tuesday, 6 October 2009
Forest Friends
First up I have this small square card.
 I've started of with a base card in Kraft, then added the two strips of Certain Celery and So Saffron cardstock. On the Celery cardstock, I've used the Friendly Words wheel to make a background. I've used some of the Celery ribbon from last months promotion. Then I've stamped the three images onto Whisper White cardstock, using marker pens and ink pads, then cut out and mounted onto the card. It gives more of a 3-D effect this way and I really don't mind cutting!! Then I've finished off the card with a button and twine.
 Onto the scrapbook page. As I mentioned before, this set is great for baby albums. I'm getting around to scraping all the pages of Caden's 1st year, to make up a small album for him. And it's nice going back, looking at the photo's and remember certain moments, wondering where the time disappear too.
 This picture goes back to his first months - a very sweet moment sucking his thumb. Something he only did for a short while.
Friday, 2 October 2009
Inkspiration Inspiration Challenge #13
So it's challenge time again and that means I def. have something to show you! This week we were inspired by this picture - a table setting! I have to admit that I did find this a little difficult and nothing really poped up in my head; that is until I opened my new pack of DP Pink Flamingo!!
 So here's my creation:
 Not alot of stamping done on this card. I went with a dinner party theme, invitation style - maybe for Christmas!
If you'd love to play along, pop over to Makeesha's website where you can view all the details and see her sample card and of course see more fabulous inspiration from her Design Team:
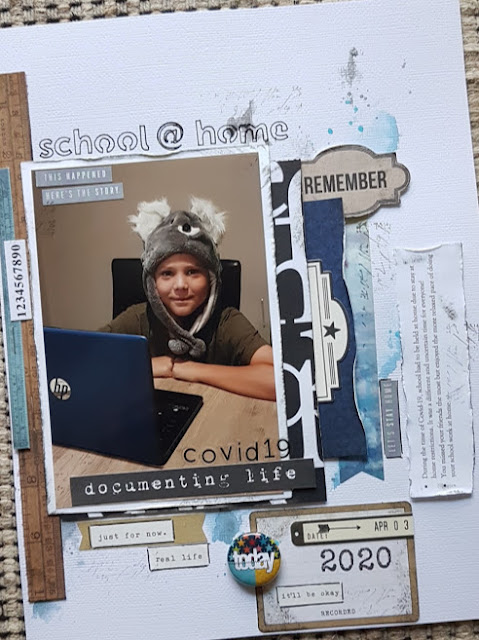
school @ home
Hello, I definitely wanted to record this little moment! School @ home due to stay at home restrictions because of COVID-19. It was certai...

-
Hi again - one lucky last post for March ☺ I'm sharing a page for White with 1 - the colour this month is Orange Peel. I love th...
-
Sorry, this post is a little late, but here it goes for the blog hop....... Hello there Magnolia Lovers and Welcome to the 1st Birthday Bl...
-
IT'S GIVE AWAY TIME. ... to coincide with my Creative Bits clearance sale , I'm also having a give away. * a pile of coloured do...


