Hello - hope you are having a good start to the week and staying warm!! We are having a cold chill in our parts!
It's a month ago that I was at The Scrapbook Store Retreat - I'm still getting thru the pages that I created on that weekend. Today I'm sharing another one of them - and I'm entering this one into the Scrap The Girls June Challenge. They have a new banner, so that was the inspiration for the challenge:
A great excuse for a girly page - I've used this picture of my mum and I on Mothers Day.
I went with a soft colour palette, making use of tags, twine and flowers.
Most of the products on this page are from Prima Marketing, including the little tags and some of the flowers. The background paper did have a 'white-wash' effect to it, I've added in a bit of mixed media work using texture paste and a stencil.
Here are a few close-up's:
Thanks for popping in to have a look. It's drawing close to the end of June - half way the year already. So much to be thankful for and looking forward to what the next half of the year will bring ☺
Creating with happiness + love ♥
Monday, 30 June 2014
Friday, 27 June 2014
Nutty Cacao Balls
Hello + happy Friday. I love the weekend and love it even better that there is only one week left before school holidays start!!
This week I've been busy baking treats for our camping holiday which we leave for next week. One of them are: Nutty Cacao Balls.
There are many different recipes and versions of this healthy snack - you only need to google - bliss balls .........
Today I want to share my version!! Quite often I just mix up together ingredients that I have in my cupboard, but I recently wrote down one version I used and I'm sharing it with you ☺
I whip up a batch of these weekly as they are perfect lunch box treats and my boys just love them ☺ I hope you will give them a go too ☺
You can print this recipe out - just click on the post title, scroll down to bottom of post and you will see the 'print friendly' icon - click on that for printing options.
Creating with love + happiness ♥
This week I've been busy baking treats for our camping holiday which we leave for next week. One of them are: Nutty Cacao Balls.
There are many different recipes and versions of this healthy snack - you only need to google - bliss balls .........
Today I want to share my version!! Quite often I just mix up together ingredients that I have in my cupboard, but I recently wrote down one version I used and I'm sharing it with you ☺
Nutty Cacao Balls
Place the following ingredients into your thermomix or processor:
10 medjool dates
1 cup raw macadamia
1/2 cup raw cashews
1/4 cup pepitas
1/4 cup sunflower seeds
1 tblsp chia seeds
2 tblsp raw cacao powder
1 tblsp coconut oil
2 tblsp maleo (honey or 100% maple syrup)
1/4 cup desiccated coconut
pinch of salt flakes
dash of cinnamon powder
a bit of extra coconut to coat the balls
Process together til all the ingredients come together.
Form into small balls and roll into coconut.
Store in fridge.
(you can substitute ingredients for different tastes - almonds can be used and other seeds too.)
I whip up a batch of these weekly as they are perfect lunch box treats and my boys just love them ☺ I hope you will give them a go too ☺
You can print this recipe out - just click on the post title, scroll down to bottom of post and you will see the 'print friendly' icon - click on that for printing options.
Creating with love + happiness ♥
Wednesday, 25 June 2014
currently creative ......
Hello crafty peoples ☺ Today I'm linking up with Currently Creative - by Give a Girl a blog aka Kellie ☺
Every day I try to be creative, whether in my kitchen or at my craft desk. This creative project that I'm sharing today, happens on my couch ☺ With our Winter weather, it's great to be cozy on the couch and crochet. Recently, I started this crochet blanket, using rope stitch which is from this book: Crochet Workshop - an absolutely gorgeous book, a favourite in my collection.
I'm using yarn that I had in my stash, just the three colours as shown, each stripe is 10 rows. I'm just over a third of the way and am finding this one hard to put down.
Not sure what the total measurements will be, but I will be sure to share that when this project is complete. I plan for it to be a baby blanket to give away ☺
The yarn is 8ply acrylic and I'm using a size 4.5 crochet hook.
I look forward to sharing some more of the 'work in progress' soon.
Thanks for coming by.
Creating with love + happiness ♥
Tuesday, 24 June 2014
Project Life storage and a few pages ......
Hey everyone, hope you are having a great week and getting crafty in one way or another ☺
Today, I'm sharing a little bit about MY project life and how I store my 'bits and pieces' for this part of my scrapbooking.
I began PL last year and got on a roll with it, completing weekly pages. But very soon I began to fall behind and am sadly still behind on 2013 .............................. but I'm still plugging away at it and am determined to see this one thru ☺ More on that some other time!
For 2014, I've decided on monthly and am happy to say, that this is much more achievable for me at this time. The photo's I use for my PL are from my phone and instagram - they are 'happy snaps' and 'in the moment' pictures. So whilst a whole month might not be totally captured, the 'little and important' moments are. This is why I love the whole idea of PL and this is my focus for PL ☺
So my storage: I have recently purchased WRMK albums in different colours and I've been replaced all my older style albums with these. I love the uniform look on my shelves! These albums are very strong and can hold lots of scrapbook pages. I'm using these albums for my traditional scrapbooking and my PL
For my PL bits and pieces, I've found these two-level plastic boxes with dividers. As soon as I spotted them at a local discount store, I knew they would be perfect craft boxes.
The boxes are inter-locking, with a lid for the top section. The dividers can be moved across or even removed - they hold the journal cards and all your other product perfectly.
The best thing for me is that I have all my PL in one spot - it sits nicely on my shelf and when I'm doing PL, I only need this one box ........... and maybe just a few other items ☺
Here are a few close-up's of some of my PL pages from this year. I've finished up to end of April, so hopefully I can now do some monthly shares and in more detail.
My PL style is simple and clean. I love using the pre-printed cards with words. I only add minimal embellishments. And I love using stamps!! This style works great for me and is a nice change, as my traditional scrapbooking is more arty, embellished and full of product ☺
My trusty manual typewriter and my box of Kellie Stamps are also a big part of my PL.
I hope you enjoyed that little share. Leave a comment for me if you are doing Project Life - I'd love to come and check your blog too ☺
Creating with love + happiness ♥
Friday, 20 June 2014
creative.ness - the view thru my 50mm fixed lens
Introducing a new segment to my blog - 'the view thru my 50mm fixed lens'
Lately, I've been re-quainting myself with my Sony DSLR camera with the 50mm f1.4 fixed lens. This is typically a portrait lens and lets in lots of beautiful light, so your pictures look lovely ☺
This segment will be all about sharing the little things and details around my home.
I like the idea of focusing on the 'small picture' - it's the little things that make up the big things.
So I'm grateful for small details ..............................................
........ this week in portrait style:
“The small things of life were often so much bigger than the great things . . . the trivial pleasure like cooking, one's home, little poems especially sad ones, solitary walks, funny things seen and overheard.”
“Find gratitude in the little things and your well of gratitude will never run dry.”
“Appreciate the little things, small joys and victories are gifts to continually lift you and recharge your spirit.”
Have a wonderful weekend!
Lately, I've been re-quainting myself with my Sony DSLR camera with the 50mm f1.4 fixed lens. This is typically a portrait lens and lets in lots of beautiful light, so your pictures look lovely ☺
This segment will be all about sharing the little things and details around my home.
I like the idea of focusing on the 'small picture' - it's the little things that make up the big things.
So I'm grateful for small details ..............................................
........ this week in portrait style:
“The small things of life were often so much bigger than the great things . . . the trivial pleasure like cooking, one's home, little poems especially sad ones, solitary walks, funny things seen and overheard.”
We discovered our favourite Winter breakfast - Baked Oatmeal.
Adding another tea-pot to the collection - op-shop treasure.
Baked goodness from my kitchen:
Anzac Slice
Hooking on a new project - a crochet blanket using rope stitch
“Find gratitude in the little things and your well of gratitude will never run dry.”
The boys are cultivating weeds and growing them in tiny pots ☺
The coriander plant has pretty flowers.
Kyle's mint plant is growing wild.
Parsley is thriving in pots.
The first of the lemons - this was a transplanted tree that we got from friends and it's coming up great.
Love having these girls free-ranging in our backyard
My craft room desk - finishing off pages
“Appreciate the little things, small joys and victories are gifts to continually lift you and recharge your spirit.”
Have a wonderful weekend!
Thursday, 19 June 2014
everyday moments - June Mood Board - Jot Magazine
Hello there ☺ Hope you are well on this lovely Winters Day ☺
Today I'm sharing a page I've done using the Jot June Board as inspiration!
I love the colour hues and the idea of using doilies, stamps and the typewriter font.
I had this page on my desk, half finished, so decided to use it for this challenge.
The background paper is some lovely feather pattern paper by Glitz Design from their "77 collection". I love the soft feel it brings to this page ☺
I've also used some bits by Teresa Collins - "family stories collection" - another favourite of mine.
Some pops of mint colour with the flowers and twine. I've also done my journalling on the manual typewriter. And I've stamped the date too ☺
I always love to add mini pegs to bring in that 'banner style' design - another favourite of mine too ☺
Thanks for coming by today and thanks to Jot for this fun challenge
Creating with love and happiness ♥
Wednesday, 11 June 2014
date and banana cake
Hello creative people ☺ Today I'm sharing another recipe from my Kitchen. This one has been well and truly 'tried and tested' many times and is our favourite cake. I make this weekly for the lunch boxes and it's very well loved. It's delicious and moist and is gluten free and refined sugar free.
I like my baking to be quick and easy, especially for weekly baking! Generally, the recipes I use are only a few steps and can be whipped up with ease - I've been known to make these before school and the boys can enjoy some on their way to the bus ☺
Enjoy with fresh homemade butter ☺
This recipe also makes lovely cupcakes - just follow the same method as above, fill cup-cake liners 3/4 full and bake for approx 15 mins or until cooked.
Walnuts are a great addition to this cake - either mixed through batter or sprinkle over the top before baking!
I've received some lovely reviews on my gluten free Ginger Spice Cake - I'm glad it's being enjoyed by some of you. Thank you for the feedback.
Let me know if you make this Date and Banana Cake too ☺
Creating with love and happiness ♥
If you would like to print out this post - please click on the post title and scroll down to bottom of post til you see the 'print friendly' button. Click and it will open a PDF and allow you to print - thank you ☺
I like my baking to be quick and easy, especially for weekly baking! Generally, the recipes I use are only a few steps and can be whipped up with ease - I've been known to make these before school and the boys can enjoy some on their way to the bus ☺
Ingredients & Method
2/3 cup medjool dates (pits taken out)
1 tsp baking soda
1/4 cup butter
1 tsp cinnamon
1/2 cup rapadura
Place all the above ingredients into a bowl and add:
3/4 cup of boiling hot water
Allow to sit for about 5mins to soften the dates and melt butter.
Add to bowl:
2-3 ripe bananas
2 eggs
Process mixture together so it's all blended well.
Add to bowl:
1/2 cup buckwheat flour
1 cup almond meal
2 tsp gluten free baking powder
1 tbsp chia seeds
Combine all ingredients well.
Pour into lined loaf tin and bake at 180 degrees
for approx 30-40 mins or until cooked
Enjoy with fresh homemade butter ☺
Walnuts are a great addition to this cake - either mixed through batter or sprinkle over the top before baking!
I've received some lovely reviews on my gluten free Ginger Spice Cake - I'm glad it's being enjoyed by some of you. Thank you for the feedback.
Let me know if you make this Date and Banana Cake too ☺
Creating with love and happiness ♥
If you would like to print out this post - please click on the post title and scroll down to bottom of post til you see the 'print friendly' button. Click and it will open a PDF and allow you to print - thank you ☺
Monday, 9 June 2014
so much fun - once upon a sketch June challenge
Hello and happy Monday! Another new week - I hope to have a few posts this week ☺
Today, I'm sharing my page for the Once Upon a Sketch June challenge - here is the sketch and the journalling theme is: "the best things in life aren't things'
Here is my take on the challenge:
I've chosen this particular photo taken by one of my boys. It captures his youngest brother playing in the rain and puddles. One of his favourite things to do!!
Most of the products on this page are by Heidi Swapp.
Here are some close-up's:
I loved adding layers to this page with the papers and frames. Also used some fun resist pieces with the Colour Shine and some stars. I found some really cool stamps recently - one of them is a large ink splatter which I've used to imitate the 'splashing in the puddles'.
Another fun challenge and page completed ☺
Thanks so much for coming by.
Created with love and happiness ♥
Friday, 6 June 2014
love this: the scrapbook store June sketch challenge
Hello - hope your week has gone well and you've had some time to be creative!
Last weekend, I had the opportunity to get 'super creative' at The Scrapbook Store Scrap Camp held in Perth. It was a fabulous few days away and I came away with lots of crafting completed: scrap pages and Project Life.
One of the pages I put together was for The Scrapbook Store June sketch ☺
Here is the sketch designed by Marelize - it's beautiful!
I chose to use a standard 4x6 photo and create the circle element with stamps, frames and flowers. Here is my take on the sketch:
I've used a very recent photo of my mum, sister and I = all dressed up for a wedding. A lovely opportunity for a photo together ☺
I got all 'flowery and girly' with this page and used Prima blooms and little wood veneer hearts. The black frame is by Manorhouse Creations.
I've even used some black Prima packaging as a mat behind the photo!
And the stitched circle stamps are also by Prima - they do the most amazing stamps!
Here are some close-up's:
Was fun to put this page together and just create from the heart.
I'm off to pop this one in the gallery and check out the inspiration there ☺
I'll have another crafty share soon - in the meantime, I'm off to enjoy the weekend.
Creating with love and happiness ♥
Subscribe to:
Posts (Atom)
school @ home
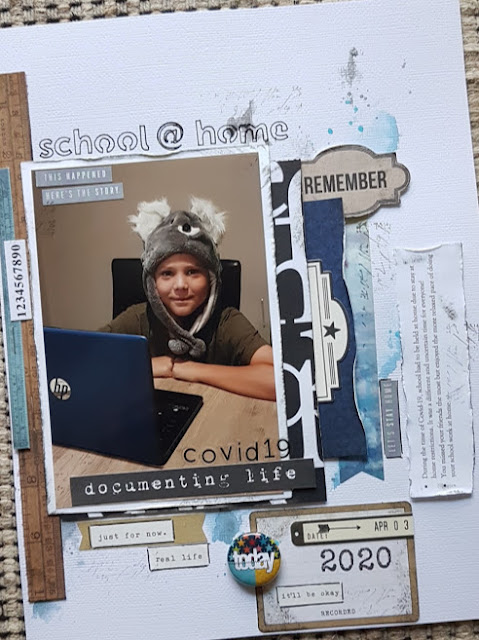
Hello, I definitely wanted to record this little moment! School @ home due to stay at home restrictions because of COVID-19. It was certai...
-
Sorry, this post is a little late, but here it goes for the blog hop....... Hello there Magnolia Lovers and Welcome to the 1st Birthday Bl...
-
IT'S GIVE AWAY TIME. ... to coincide with my Creative Bits clearance sale , I'm also having a give away. * a pile of coloured do...
-
Hello - half way during school holidays - it's been fun and busy - as always, it's going by too fast. I've created this LO for...