Sunday, 31 May 2009

A trio of Colours and Creations.

When I was just signing in to do this post, I read that this is post #301. Wow, how cool!

Every week, I get the Splitcoast Weekly Inkling in my email Inbox. It's a newletter full of inspiration - tutorials, colours challenges, sketch challenges etc. I always look over to the colour challenges to see what colours they have come up with. This weeks looked very interesting: Bashful Blue, Pumpkin Pie and So Saffron. These are colours I would never think to put together, I thought I would see what I could come up with.

First up I've made a card using Friends 24/7 stamp set. As you know, I'm really loving this set at the moment. I've used the wheel on the piece of scallop edges blue cardstock. Then I've inked up the flourish image in So Saffron and rolled into the blue ink. Then with my Stamp-a-ma-jig, I've lined up the image and stamped over the top in Versamark, then clear embossed. I think the photo just picks up a little bit of the shine. I've finished off the card with some blue striped ribbon and three half pearls.
Just when I was photographing this card to blog, I noticed a mistake. But it was a bit late for me to fix up - can you see what it is??

Next up I've made this very cute 3x3 note card tote, which is the tutorial on this weeks Inkling. You can find this tutorial here. It's super cute and super easy. I've also made three small note cards to go along with this little tote.

The three cards are all very similar in design, just using the three colours. I've used watercolour paper, inked up the image and gently sprayed with water, then stamped onto the watercolour paper. In the photo below, you can see the watercolour effect!

And last but certainly not least, I've made up this 8x8 scrapbook page of Caden at the beach. This was his first time having a play in the sand. I just love that expression on his face.
It's a very simple layout. On the piece of blue cardstock, I've used the Sanded background stamp. And for the title, Enjoy Every Moment stamp set.

I had so much fun creating this trio - hope you enjoy them to.

Monday, 25 May 2009

Male card challenge

This weeks challenge at the ESAD group (Stampin'Up forum for demo's) was set by the lovely Karen Thomas from Luv to Stamp The challenge was to create a male card in 10 minutes and it had to include circles. Great challenge Karen. Thought it took 10mins to make, I think it took longer than that to think about what to create. Usually my cards have more layers and embellishments, so this was a nice change. So here's my very simple masculine card!
I've started off with a base card in Kraft. I've used Circle Circus to stamp up the circle images along the bottom panel of card. Then I've layered some strips of DP from Urban Oasis and distressed the edges. I've run another piece of Kraft cardstock thru the crimper and layered onto the DP. Then I've added a clear button with twine. The sentiment is from Wonderful Favourites and it's completed with two black brads.
With some left-over DP, I made a Sunny Boy container. These are just super cute and I love making them So this one matches the card nicely.

And here they are together. Thanks for the fun challenge Karen.

Thursday, 21 May 2009

More colour inspiration............

When I do a colour challenge, I like to start off with full sheets of cardstock, so A4 size. If I make a card then I'm usually left with large pieces of cardstock and smaller scraps. So I like to make up a scrapbook layout or a 3D item. Otherwise these peices get put into my scrap basket, but then I never seem to use them.
As I said in the previous post, the colours from the Inkspiration Colour Challenge for this week are just gorgeous. So I picked out this photo of my four boys and made up an 8x8 scrapbook page.
Once again, I've used the set Friends 24-7 and the Friendly Words roller. I think these are my favourites at the moment. I've also used a piece of DP from Good Morning Sunshine.
With the wide piece of twill, I've rolled the wheel in choc chip and added a clear button with some twine. Apart from that and the photo corner, I haven't really added many embellishments. I tried, but nothing worked and in the end I felt the page was complete. I certainly didn't want to take away from this cute picture!
Product used:
Stamp set: Friends 24-7, Friendly Words (wheel)
Cardstock: Choc Chip, Really Rust Sage Shadow, Very Vanilla, DP Good Morning Sunshine
Ink: Choc Chip
Accessories: Twill, Clear button, Twine, Photo corner punch, brad, Cutter Kit (distresser)

Wednesday, 20 May 2009

Inkspiration Colour Challenge

This week we have a colour challenge from Makeesha and she's picked out a gorgeous colour combo here. I really enjoyed this one.
So here's my creation. I've used the Friend 24-7 stamp set and co-ordinating wheel. When I first saw this set, I really didn't think much of it and it was far from the top of my wish list. But Convention changed all that. Shelli demonstrated with this set and created the most beautiful things. Now I love it!!
The base card is Sage Shadow onto which I've stamped flourish image in the same colour ink.
Then I've layer some Very Vanilla onto Choc Chip with the edges torn. I've used the Stampin' round wheel Friendly Words in Choc Chip ink. I've first rolled this once and then brought the wheel to the edge of the cardstock, then rolled back and forth many times to create the edge. A vintage look!
Then I've stamped up the bird image in Basic Brown, coloured in with ink pads and matted onto some Really Rust cardstock. I've used the cutter kit to distress the edges of both pieces.
Then I've finished off the card with some twill and choc chip tafetta.
With some of the left-over cardstock, I made a sour cream container (Sunny Boy). These are just so cute. You can see it peaking out from behind the card.
As I said before, these colours are just beautiful together and I'm sure I'll be using them again.

Tuesday, 19 May 2009

Scrapbook Challenge

The ESAD group (Stampin'Up forum) has a new challenge going - a Scrapbook Challenge - set by the lovely Mandy Schiller. Here is the sketch we had to work with provided by Page Maps - Becky Fleck. These are such great sketches to work with and I had a great time using this one.
So here is my 12x12 page scrapbook page using some photo's of my cute Caden. I've used some retired DP Fall Flowers, as it had the perfect leave print and just the right colour. And I've used the Always stamp set.


Thanks Mandy for the wonderful challenge. I know I'm going to be getting some scrapbook pages done now. Can't wait for the next one.
Products used:
Stamp set: Always
Cardstock: Riding Hood Red, Old Olive, Baja Breeze, Whisper White, DP Fall Flowers
Ink: Riding Hood Red, Old Olive, Baja Breeze
Accessories: Brads, Machine stitching, Mat pack, Dimensionals, Circle cutter, Corner round punch.

Tuesday, 12 May 2009

Gift box with acetate

I have been wanting to get some clear acetate for a few stampin projects that I've always wanted to try out; and finally this week I did just that. Though I had to go to three different stationery stores before I found some. The last store I tried sold packs of 10 A3 sheets which was just perfect; now I have some to last me a little while.
So here's what I made: a gift box filled with chocolates! This box is similar to one of Makeesha's MIM tutorials, so if you would like some details you can have a look there. But I've just designed this one on my own with the lovely Rasberry Tart DP. The measurements are 20cm high and 5cm x 9cm for the width around.
For the tag I've used a Sale-a-bration set - this sentiment is perfect for this gift box. I've used the Scallop edge punch to make the corners and then used a brad and tafetta ribbon to tie onto the wide ribbon.
Now that I've made one of these, I know I'll def. be making some more very soon.
I've started working on a Convention Momento Box which will hold a mini album and other treasures from Convention. I've also used some acetate on this project as well, so I hope to share that with you all sometime soon.

Saturday, 9 May 2009

Inkspiration Sketch Challenge #7

Makeesha is back with her weekly challenges - oh what fun. And she's started off with a sketch challenge - my favourite. So here is the sketch we had to work with.
And this is my creation. I've used Trendy Trees, one of the stamp sets in our Convention bag, and Candy Lane Designer Paper.
So I've gone with the Autumn look using reds and browns and some hints of pink. Though, I've never really seen pink leaves!! For the trees, I've inked into Pink Pirouette and rolled the edges of the stamp into Riding Hood Red. The middle tree has been stamped onto some Vanilla, then I've cut out and mounted with dimensionals. I've also used some Hodgepodge hardware in Silver, some striped ribbon and brads. I have also used the Stamp-a-ma-jig quite a bit, as it helps to line the tree branches with the trunks and also for the sentiment. This is one handy tool I couldn't do without!


Product used:
Stamp set: Trendy Trees
Ink: Close to Cocoa, Pink Pirouette, Riding Hood Red
Cardstock: Candy Lane DP, Close to Cocoa, Very Vanilla
Accessories: Hodgepodge hardware, sponges, dimensionals, ribbon, brads, Stamp-a-ma-jig,

Friday, 8 May 2009

Mothers Day gift wallet.

I always like the idea of gifts with a hand-made touch to them. So for Mothers Day this year, I've made a couple of these gift wallets with a belly band. They are so adorable in-real-life, so I wanted to share them here as well.
Here is a view of the wallet open. I've used Candy Lane DP, ribbon and Always stamp set.
I've cut a peice of 12x12 in half so it measures 12" x 6". Then along the longer side, I've scored 1" in, which folds up to make the pockets. Then I've scored at 4" intervals along the other side, to form the wallet.
So I've made three pockets into which I've put a gift card, a sachet of tea and a small note.

This is the wallet folded and with the belly-band. To make the belly band, I've cut a 2" x 12" piece of DP and wrapped around the wallet, so that it can slide on and off quite easily. I've finished off with some ribbon and the heart image from the Always stamp set.

And here's a close up of the heart. I've inked in Pink Pirouette and rolled the edges into Close to Cocoa ink. I've re-inked the heart image again, in Cocoa and stamped the little flower onto a small piece of white cardstock, punched out with circle punch, then attached a brad to the centre.

Well, these are off to be posted. They won't be in time for Mothers Day, but it will still be a nice suprise in their mail box early next week. (as long as they don't look here, which I'm quite sure that they don't very often, so I should be safe)
I'm making a 12x12 scrapbook page with the two stamp sets we got at Convention, Trendy Trees and Circle Circus; so I hope to share that with you soon.

Thursday, 7 May 2009

Watercolour WOW!

One of the presentations at Convention was a demonstration by Shelli. She showed us her stampin' style, stamps she loves and techniques to WOW us. She certainly provided lots of inspirations and laughs during her presentation. She is an amazing stamper and I really love her style of stampin'.

One of the projects she showed was a card using A Kind Word. I particularly like this set, as it requires colour. Shelli used the watercolour crayons to colour the image. But instead of applying the crayon direct to the watercolour paper and then using the aqua painter the blend in the colour; she used her aqua painter to get the colour from the end of the crayon and then applied it to the paper. This was a WOW for me and I knew I would have to try this when I got back home.

So here is my card. I've used a Pink Pirouettee base card and stamped the En Francais background stamp in the same colour ink. I've also sponged the edges of the cardstock.
Then I've stamped the image in Stazon black onto watercolour paper and used the crayons and aqua painter to apply colour to the paper. This technique gives you good control over the amount of colour you want to use, so you can go for the softer look, or apply more colour to give it depth. For this card, I've gone with a single layer of colour to give it a soft look, as I think it goes with the colours.
I've used my oval cutters to create the oval shape, also one in the Rose Red. Then with the 3/4" circle punch, I've punched out lots of circles from the Rasberry Tart DP and made the scallop edge.
Then I've made a small tag to go behind the main image. The sentiment is from the same stamp set. For the ribbon, I've cut a peice of white grograin and using a sponge dauber, sponged Rose Red ink along the ribbon to create the coloured ribbon. With white ribbon and ink, you can have any colour ribbon you desire! I've also sponged around the edges of the little tag with the Rose Red.
This card has a real vintage feel about it which I just love. Hope to show you more soon.


Products used:
Stamp set: A Kind Word
Cardstock: Pink Pirouette, Rose Red, Rasberry Tart DP, Water colour paper
Ink: Pink Pirouette, Rose Red
Accessories: 3/4" circle punch, CM cutters, aqua painter, sponge daubers

Monday, 4 May 2009

Convention pictures

I've arrived home from Convention, safe and sound, a little tired but very amazed and happy with the experience. It was fabulous!!!!!
It was a very busy two days of Convention. It started off on the Friday morning. Momento Hall was opening up early, so we had our breaky and braved the very cold morning to walk over to the Convention centre, to check-in, receive our convention bags and have a look at the wonderful things to buy at Momento Hall.
Here is the front view of the very beautiful Crowne Plaza where we stayed for the three nights. It doesn't show much of the fog, but let me tell you, it was like walking in a fridge!! Glad I had a nice warm jacket and scarf.
Here I am just after check-in with my beautiful convention bag, in a lovely cocoa and kiwi kiss colour. And it matched my Convention tag too. But I must sadly add, that my Convention tag slipped off my bag sometime during the first day, so I no longer have it.
General session started off with the introduction of Shelli. She is one amazing lady, so genuine, kind and gracious. She took the time to pose for photo's for anyone that asked and always wore a beautiful smile. Here a few photo's of the Perth gals in the theatre and one of Shelli on stage.
We even got to have a video tour of the home office in Utah, which was very, very impressive.


Through-out the two days, we were wowed by presentations from demonstrators and inspired by motivational speakers. They were all great. Three Perth demonstrators, Makeesha, Ngaire and Sarah had the honour of presenting and they all did a fabulous job. We learnt so much from their experience as demonstators and they shared their knowledge and talent very graciously.
The end of Convention came all too quickly. We had a very nice dinner before heading to the theatre to see the awards ceremony.
Here we are, all 'prettied' up for the night. (Makeesha, Charmaine, Jen, Monique, me and Marion)


And some pictures of the delicous food we had.


The awards ceremony was fabulous. It was great to see so many demonstrators awarded for their outstanding performance during the year. From 'milestones' to recruiting to incentive trip winners to demonstrators of the year. There were so many of them.
It was announced Convention will be in Sydney next year and the incentive trip for 2010 will be in Hamilton Island.
It was an experience I won't forget. I've come away with many wonderful memories and valuable business building tools as well as lots of motivational thoughts. It was great to have shared it with friends and to have met lots of lovely stampin' ladies, especially the Perth girls.
As well as these photo's, I've taken so many photo's of all the display boards with lots of stunning idea's. I can't wait to start stampin' and share with you many new stampin' creations that I've learnt about.
After the fabulous two days of Convention, we had the next day to relax and take in some scenery. I'll be putting some of those photo's on my other blog, 'Captured'.

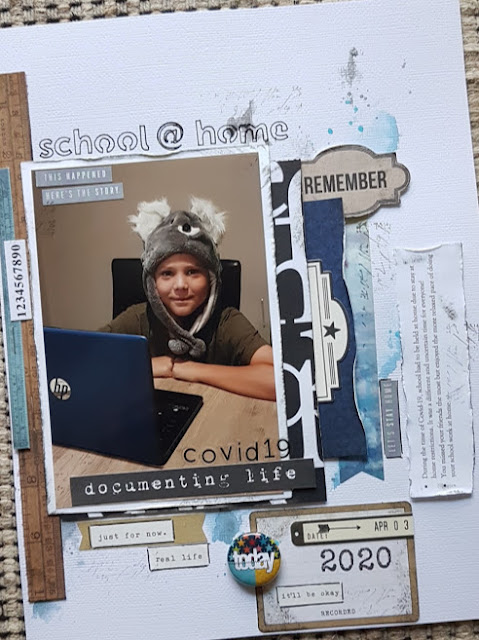
school @ home

Hello, I definitely wanted to record this little moment!  School @ home due to stay at home restrictions because of COVID-19.  It was certai...