Friday, 28 September 2007
Card giveaway
These three gift cards have been made using one sheet of A4 cardstock. I've divided evenly to create 10cm x 10cm cards; a really cute size to work with. I've stamped with Scribble This and Wonderful Words for the sentiment. The DP is from the Spring mini called Petals & Paisley.
To celebrate my blog being one year old and nearing 3000 visitors on the counter; I'm giving this little trio away. So leave a comment and I'll be drawing a name early next week. (anyone can enter)
Enjoy your weekend!
All images Copyright Stampin'Up 2007
Tuesday, 25 September 2007
Tri-fold card
First of all, my blog is ONE year old. It's been fun updating and sharing with you all, my life and SU creations. So thank you to all who take the time to have a look at my 'stampin space.
My cards today are called tri-fold cards. I've started off with a 12x12 piece of Regal Rose cardstock, then cut in half. I've scored at 10.5cm to make a normal card, then the remaining overlaps in the front. (it's always hard to explain, so I hope the pictures do justice)
Both cards use the same stamp set, Sweet Shapes. On the first card, I've paper pierced the edge using the Mat Pack. The second card, I've torn, then sponged the edge.
Top view of the card to give you a better idea of the sections of the card.
Card Recipe:
Stamp Set: Sweet Shapes
Cardstock: Regal Rose, Choc Chip, Taken with Teal, Very Vanilla
Ink: Choc Chip, Taken with Teal, Regal Rose
Accessories: Ribbon, Pink Brad, Mat pack for paper piercing
All images Copyright Stampin'Up 2007
Monday, 24 September 2007
Card Gallery
Just letting you know, all my card creations can be viewed in my gallery at Splitcoast Stampers. The link is located to the left of this post. I will be adding more in the next few days. Thanks for looking.
Pocket card with tag
Back again!! I have so many different idea's for cards; just not the time to make them all. I'm going to attempt to make some of them this week and try to post everyday. What, did I say everyday?? Well, I will certainly try. Here is some cute little kids cards with some fun tags.
The first picture shows the card without the tag. The base of the card is a single piece of cardstock - 10.5cm x 15cm Before I've adhered the second layer, I've made an opening for my tag using the Window Punch from Stampin'Up. Cardstock is punched once, then slide along and punch again. This is the little pocket for the tag.
The second picture show the tag, which I've made up using Whisper White cardstock and indented the edges with a circle punch. The tag is designed for you to write your message.
This third picture is another variation, using the same stamp set.
Card Recipe:
Stamp set: Wild about You, Alphabits
Cardstock: Taken with Teal, Gable Green, Cool Carribean
Ink: Taken with Teal, Certain Celery, Cool Carribean
Accessories: Brads, Silver Cord, Ribbon, Eyelet, Mat pack for paper piercing, Window punch
All images Copyright Stampin'Up 2007
Saturday, 15 September 2007
Rollerblading fun
Tyson (in brown jacket), Kyle and Liam (in blue jacket)
We braved the cold and windy weather today, to take the boys to a little fun park near the Busselton Jetty so they could roller blade on the special skating track. All three boys now have roller blades and are having heaps of fun together. Tyson & Liam have only had them for a few days and are already quite confident. As the weather starts to warm up, I'm sure we'll be coming here again!!
Wednesday, 12 September 2007
The smell of Spring
Monday, 10 September 2007
Pocket card
I wanted to make a card, but something different than an ordinary card. So I found this idea and thought I'd give it a try. The inspiration comes from Belle Papier http://bellepapier.blogs.splitcoaststampers.com/ where you can view the tutorial. (need to scroll down a little way)
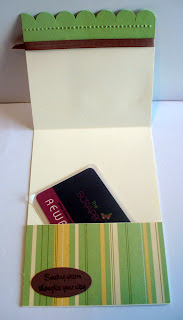
This is my take: it's called a pocket card, perfect to hold gift cards or extra little notes. The first picture is how the card looks when closed; in the second picture you can see the pocket to hold gift card etc...
Card Recipe:
Stamp set: Like it a Latte
Cardstock: Very Vanilla, Apricot Appeal, Certain Celery, Close to Cocoa, Petals & Paisley DP
Ink: Choc Chip, Apricot Appeal, Certain Celery, Close to Cocoa
Accessories: Ribbon, Oval Punch, Paper Piercing, Sponging, Slit Punch for Scallop border
My card measures 4.25 inches x 12 inches. I've scored the vanilla cardstock at 2.5 inches and 3 inches from each side. Then I've added some extra length to the overhang by adding a scallop edge. Was fun to make and fairly easy. I'm sending nine of these to my SU upline for her demo get together later on this week, as my swap card. So I hope they love it.
All images Copyright Stampin'Up 2007
Sunday, 2 September 2007
Blissful Busselton!!
The start of Spring and we have some beautiful sunny weather. Perfect for walks along the beach, collecting shells and dipping our feet in the water. This is what we did today. It was so nice to walk barefoot in the sand!! The boys certainly enjoyed it and before I knew it, they had their pants off and were splashing around in the water.
We've had quite a bit of rain lately and hopefully there will still be some more. But it certainly is very nice to receive some warmer sunny weather!!
Subscribe to:
Posts (Atom)
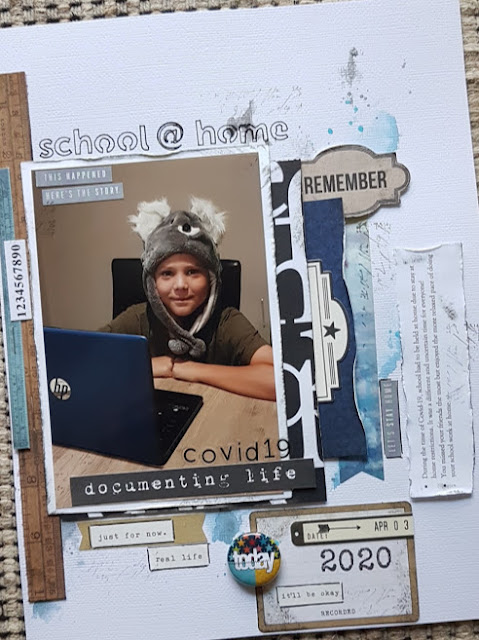
school @ home
Hello, I definitely wanted to record this little moment! School @ home due to stay at home restrictions because of COVID-19. It was certai...
-
Sorry, this post is a little late, but here it goes for the blog hop....... Hello there Magnolia Lovers and Welcome to the 1st Birthday Bl...
-
IT'S GIVE AWAY TIME. ... to coincide with my Creative Bits clearance sale , I'm also having a give away. * a pile of coloured do...
-
Hello - half way during school holidays - it's been fun and busy - as always, it's going by too fast. I've created this LO for...