Friday, 25 September 2009

Inkspiration Colour Challenge #13

WOW, it's Friday already, the week just flies by!! The Inkspiration Challenge for this week is this fabulous colour combo:
And here's what I've come up with - I had to laugh though. These are the pefect colours for a masculine card, but instead, I've come up with something pretty!!
A cute 'little' bag and matching card. The card is a standard size, so you are able to judge by that - the little bag is quite small, BUT very cute. Perfect for a small gift or some chocolates.

There's lots of Old Olive in both the card and the bag. I've used Fifth Ave Floral, the very beautiful rose image. I've stamped the image onto the base card and also on Watercolour paper, so I could colour in with my ink pads and aqua painter and get that lovely watercolour effect. Then I've cut out and sponged the edges, mounting onto the card with dimensionals.
The small strip of DP is from Urban Garden and worked perfectly to make up the colours.
I've used my eyelet border punch on the Vanilla strip. Across the top, I've added some paper piercing and the word friends, which I've picked up with the SU marker pen in choc chip from the Best Yet stamp set.
Here's a closer look at some of the detail.

On to the little bag - I've kept the style similar to the card, imitating the strips of cardstock and DP. For the flower embellisment, I've cut out some chocolate felt, added a button and tied off with some twine. The handle is with the grosgrain choc chip ribbon.


So there you have it, hopefully I've inspired you with these fabulous colours. If you would love to join in the fun, check out further details here.
And then be further inspired by Makeesha and her lovely Design Team:
Have fun with it and I look forward to seeing some great creativity!
It's the start of school holidays, two weeks of no routine and rushing around; lots of time to relax with the kids. I'm going to enjoy it. So til the next time I get back here......

Tuesday, 22 September 2009

Scrapbooking Pic of the Week

I've finally managed to get back here and show you my Pic of the Week (from last week) in a scrapbook layout. I went with a sketch challenge from Totally Addicted to Sketch. If you haven't seen this site, pop over and have a look - you won't be disappointed - there sketches are amazing. So here is the sketch they have up at the moment:
And here's my scrapbook layout:
This is a 12x12 layout and I've used just an ordinary size photo - 4x6. So there is alot of blank space, but it has still balanced out great.
I've started off with a background in More Mustard cardstock. With my Stampin' wheel - Friendly Words - I've inked up in the Versamark and then rolled around edge edge, rolling over each other a number of times. Then I've sponged all the edges.
I've added some layers of cardstock and DP as per the sketch, in Choc Chip and Not quite Navy.
I've gone with Organic Outlines to make the leaf images. I've stamped one onto the Mustard cardstock and two have been stamped onto other cardstocks, then cut out and mounted onto the layout with dimensions. These edges have been sponged with ink and I've added some small peices of bling! The heart image is a piece of felt with a button attached using twine.
Then I've finished off the layout with the title and some small words.
Here's a closer look of some detail.
Hope you've been enjoying all my scrapbook creations so far - it's been fun scrapping recent photo's and feels like I'm getting more up-to-date.

Friday, 18 September 2009

Inkspirations Sketch Challenge #13

Well I'm already going onto my third challenge with the Inkspiration Challenges held weekly from Makeesha. It's great to have these creations to do every week and is certainly keeping me on track to stamp. I love it!
So this week, it's a sketch challenge - we all love these and they are a great step to making a beautiful card. So here is the sketch we had to work with:
And here's my creation:
I couldn't go past colouring in a stamped image this week, so I chose A Kind Word. I love these images to colour, particularly when stamped on watercolour paper.
I've used the Walk in the Park DP, so that has been the basis for my colour combo: Baja Breeze, Cameo Coral and Basic Grey.
I've layered up the various cardstocks and DP as per the sketch.
Then I've stamped the image onto watercolour paper and coloured in using my ink pads and aqua painter. This gives a lovely, soft look!
For the little extra strip that goes across the card, I've used my eyelet border punch and then tied some twine and a pearl around it. Here's a closer look at some of the detail:


Sketch challenges are also just FABULOUS for scrapbooking and you all know that I LOVE scrapbooking. So I've flipped the sketch to one side and used this picture of my handsome son on his 10th birthday.
It's an 8x8 layout and I have used a 5x7 photo, so it does take up alot of the page. But with this sketch it worked perfectly.
I've used a Kraft base and stamped up with the Sprinkles stamp set. Then I've matted the photo onto some White and Night of Navy cardstock.
For the three squares, I've used Pacific Point and Good Morning Sunshine DP - I thought the little owls were just cute. On one of the squares, I've folded a small piece back to reveal the number '10'!
I've added some rub-on's which you can see better in the picture below and some paper piercing which really finishes off the page.

So there's lots of ways to use this sketch, whether you card-make or scrap. Head on over to Makeesha's website for all the details, how you can join in and also view her fantastic creation from this sketch. And be sure to check out the wonderful creations from her design team - they will inspire you fabulously!
Renee

Look forward to see what you all come up with.

Monday, 14 September 2009

Pic of the Week.

Here we are, back again with 'Pic of the Week'. Father's Day has just been and I always try to take a picture to remember the day. So here are my four beautiful boys with their amazing dad.
Come back later on in the week to see this picture in a scrapbook layout.

Friday, 11 September 2009

Inkspirations Inspiration Challenge #12

It's time for another Inspiration Challenge. Here is the picture, a lovely quilt with some very bright colours.

And here's my creation:

So how did this inspirational picture inspire me to create? Well, when I first saw it, I thought Circle Circus, simply because of the circle pattern on the quilt. I went with the colours Pacific Point, Baja Breeze, Yoyo Yellow and Whisper White.

I started off with a base card in White, then added a layer of Pacific Point. Then with a strip of White, I used one of the circle images and my Stamp-a-ma-jig, to make a few rows imitating the pattern of the quilt. I've alternated these in the Pacific Point and Baja Breeze.

The I've added a strip of Yoyo Yellow and some DP from Pacific Point.

From here, I've picked up on the yellow cushions. See as I don't have the Yoyo Yellow ink, I decided to go with some white embossing and I believe the cushions have some white print on them! So I used another image from the Circle Circus, stamped in white ink onto Yoyo Yellow cardstock and then embossed in white. I've matted this onto some White and then Pacific Point.

To complete the card, I've added some ribbon with a blue button, some paper piercing and a little sentiment from Famiy Phrases.

Here's a closer look at the detail:


I've only used Yellow on the odd occasion, simply because it's so bright. But after using it in this card, well .... it's ok. And I noticed that there's alot of yellow in the clothing shops as well. So I'm pleased with how this card turned out and you may be seeing some more yellow soon!

If you would like to join in the fun and see how this picture inspires you, then go to Makeesha's website for all the details and be sure to check out all the other wonderful talent from her design team:


Enjoy it and I look forward to seeing what you come up with.

Monday, 7 September 2009

Birthday boy cards.

'Pic of the Week' will be back again next week - I'm going away for a few days to celebrate some birthdays and see family. So I will leave you with a few birthday boy cards!!
The first card uses Nursery Necessities. This is a great set to use for baby cards or for a 1st birthday. I've used the colours Pacific Point, Bashful Blue and Riding Hood Red. And I've used my all time favourite alphabet set - Tidy Alphabet.
This next one is a Double Pocket card and you can view the tutorial on Splitcoast Stampers.
Once again, I've used Pacific Point - such a fun boy colour - and this time with Baja Breeze and Tangerine Tango, along with some DP in Baja Breeze.
I've used the Wild About You and Family Favourites stamp sets.
I've made my card as per the instructions but have only put a tag in the top pocket. Of course, you could make up another tag or even pop in a gift card. There's so much you could do with this card design and there are plenty more ideas in the gallery at Splitcoast Stampers.
Here's a little look at the tag that goes into the top pocket:
I'll see you back at the end of the week for another round of the Inkspiration Challenges. Be sure to check out the latest challenge from Makeesha, she is giving away a $40.00 stamp set of your choice, for the winning card.

Saturday, 5 September 2009

Scrapbooking Pic of the Week

Earlier on this week, I showed you my 'Pic of the Week'. Well I've put it on a scrapbook layout - thought I'd do up a 12x12 page layout.
There were quite a few different colours in the photo, but I chose to go with blues and red with some touches of green.
The base cardstock is Tempting Turquoise. Then I've added some layers in Riding Hood Red and Pacific Point. I've matted my photo onto some White cardstock.
For the embellisments, I've used some felt. I thought these squares with some coloured buttons would add a nice touch to the page. I've also stamped up the branch and small bird from Cheep Talk and also used the sentiment from the same set. The title 'brothers' is done with Tidy Alphabet (one of my favs but retired)
At the top of the photo I've added a strip of DP in Riding Hood Red and some ribbon, then added a quote printed out onto copy paper.
Last but not least, I've added some paper piercing around the Top Note diecut.

I'm really pleased with how this page turned out. I've kept the focus on the picture and used only a few embellisment to add texture. I find balance is really important: so have your photo in place, then add your embellisments, making sure they follow lines.
Enjoy your weekend with Father's Day. I'll be back next week with some more inspiration.

Friday, 4 September 2009

Inkspiration Colour Challenge #12 and DT member

I'm super excited to bring you this weeks colour challenge from Makeesha's Inkspiration Challenges as a design team member. I've been chosen to join her fabulous team and am really looking forward to working with all of Keesh's fabulous challenges, her other design team members and viewing all the wonderful creations from everyone. There's so much talent out there, so I'm really honoured to be a part of this and I hope my creations inspire you just a little.... So a big thank you to Makeesha.

As you know, I LOVE all kinds of challenges - they are a really good starting point to creating and for me, they give me that little bit of motivation that I sometimes need.

So for this week, Keesh has come up with some very 'Spring' like colours. Although the weather over here is not much like Spring; it's still rather chilly.

Here's my creation.

I went with the whole Spring theme and chose to use the Good Friend stamp set. It's such a cute birdie!

So I've started off with a base card in Regal Rose, then added a layer of Real Red and then a smaller piece of So Saffron in the Designer Series Paper. I'm using so much of this lately, it really is beautiful.

For the main image, I've stamped up the bird in So Saffron, then rolled the edges into Regal Rose, just for some added colour. I have used the Stamp-a-ma-jig to have the legs and beak in the correct position. I've cut out an extra piece of DP for the wing and attached with a small piece of tape. The bird also has a small rhinestone for her eye!

At the bottom of the image I've tied some wide grosgrain ribbon in the Rose and made a flower embellishment with the flower image in the same set. I've simply stamped the flower three times onto Whisper White, cut out and attached with a brad. The picture below gives a better view of the flower.

Then I've finished off the card with a row of paper piercing at the top of card and also the sentiment from the Cheep Talk stamp set.


Usually after one creation, my desk has an array of coloured cardstock, stamps, ribbon and other pretties; so rather than pack it all away, I like to use up the left-over cardstock that I've already cut up. Whether that be for another card, a scrapbook page, maybe a 3D item.

Well, I had the perfect photo to use with these colours, so I've also made up a scrapbook page with this colour challenge.


This picture is of my beautiful neice, who you will see here in other posts as well. My sister-in-law has given me pictures of her, so I can make some pretty pages with pink and lots of ribbon!

So now you've seen some inspiration, have a go for yourself and be sure to check out all the lovely creations from the other Design Team members.

and of course Makeesha, who wows us continually with her amazing creations.
Enjoy yourself with this challenge and see you again soon.

Delicious Diva Challenges

Delicious Diva Challenges are having a sketch challenge for the next two weeks. You can view all the details here. Have a look and join in the fun - they've come up with this great sketch!
And here is my sweet and simple card.
I've been using the felt again!
The base card is Pink Pirouette onto which I've layered some DP in Pink Pirouette. Then I've layered some Choc Chip DP onto some Choc Chip cardstock. For the main image, I've stamped a little tree trunk from Trendy Trees, the cut out a circle of pink felt and attached some buttons with thread. I've also made a bow out of chocolate felt, but it's such a dark colour and very hard to photograph! Then I've finished off with some paper piercing.
Here's a closer look at the tree and bow. Mmmmm, just love those little buttons.

Thanks for a fun sketch Kel and Kristy - I certainly look forward to seeing your challenges.
Speaking of challenges - come back later on today and see something exciting.

Thursday, 3 September 2009

Scrapbooking and Felt

There's been lots of scrapbooking happening here of late. I was really excited when I stumbled across this amazing scrapbooker who uses felt and materials in her creations. Her name is Tania and you can view her work on her blog. She has a new class starting on September 7th called Scrapbooking with Fabric - check out the link for more details - it's sounds like lots of fun.

Anyway, I love the idea of using different mediums on scrapbook pages. I had a few A4 size pieces of felt laying around, so I used some in this 8x8 layout of Adam and Amber, my nephew and niece.
I've started off with a base of Kraft cardstock. Then I've layered it with Rose Red, Choc Chip, Designer Series Choc Chip and the photo.
From here I've just added my embellishments.
I used the heart image from the Always stamp set - first I stamped onto some thick cardstock, cut out and then I had a template to work with. Then I traced the heart onto the Chocolate felt and simply cut out.
I've also used felt flowers from the Flower Fusions by Stampin'Up. So I've layered the flower onto the heart and then added a cream button from my stash.
The Organic Outlines stamp set has been used as a background along one edge of the Kraft. Then I've stamped the solid leaf image onto some Whisper White, cut out, then layered onto the page.
The title 'love' is done with the Tidy Alphabet set - a retired stamp set. And I've also used Lifes Definitions for the word 'together'.


I'm so pleased with this page - I love the added texture of using felt and I will def. be exploring ways to use it again very soon.

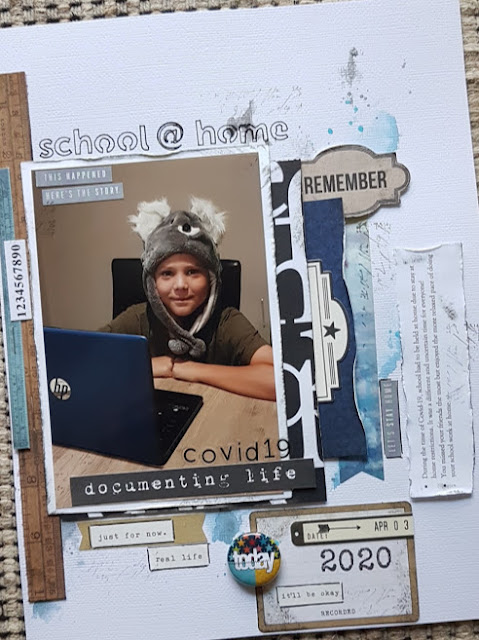
school @ home

Hello, I definitely wanted to record this little moment!  School @ home due to stay at home restrictions because of COVID-19.  It was certai...