Sunday, 28 June 2009

Magnolia Down Under Challenge #16

The lastest challenge for the Magnolia's is a colour challenge from Kellie's Magnolia Down Under Challenges There were a couple of colour combo's to choose from. I chose the Pinks/Browns/Whites/Creams.


I've started off with a base card in Cameo Coral, then added a layer of DP from Rasberry Tart. I've stamped the Magnolia image onto white and coloured with my inks and aqua painter. Then I've layered onto pieces of Cameo Coral and Close to Cocoa. I've nicely rounded off all the edges with the corner rounder punch.
Then I've added a piece of vintage lace and a cute button to one side of the card. I found these little treasures at a little op-shop in my local area.
I've finished off my card with a sentiment from 'Best Yet' (hostess set)


Here's a close-up of the very cute button. I could only find two of these - but I got heaps of other really cool ones as well. I'm sure I will use them soon as well.
Thanks for the fun challenge Kellie, can't wait for the next one!!

Thursday, 25 June 2009

Inkspiration Sketch Challenge #7

Well this week is different from last week when I had something to show you nearly everyday. Whilst I have been creating, it's been for some upcoming classes and kits that I'm preparing. And I've had a great time doing this, so I will def. share it all sometime soon.
I'm just getting in on time for Makeesha's sketch challenge for this week. I LOVE the sketch that she has provided for us. Though I have to say that I was entirely happy with the first card I made, so I went on to make a second. I think it was how the colours came out! Anyway, here is the sketch we had to use:
This is my first creations. I've used 5th Ave Floral with the watercolour technique for the rose. You can view my previous post as to how I achieved this.
I've layered the pieces of cardstock and DP as per sketch using Pink Pirouette, Regal Rose, Very Vanilla & White along with DP from Candy Lane. I think it was the Vanilla that threw the colour out of balance, but this card actually looks better in real life. I've used a Flower Designer brad for the top of tag with some vanilla tafetta. I've also used another piece of vanilla tafetta down the bottom. The sentiment is from Best Yet hostess set and I've used the punches to layer it on the card.
Here's a close up of the rose. It's such a pretty technique and each time you do this technique, you end up with a different result!


My next card was a little bit more simple. I've used the Good Friend stamp set. The cardstock colours are Rose Red, Kiwi Kiss, Whisper White; which co-ordinate perfectly with the Rasberry Tart DP.
I've used my glue pen and glitter and a clear gem to make the flowers sparkle. I've also used the scallop edge punch, mat pack and some grosgrain pink ribbon.


And here's a close up of those sparkly flowers.

I will def. be saving this sketch to my favourites - it's a fun one to do. And I would love to use it for a scrapbook page! But I'll save that for next time....

Thursday, 18 June 2009

Watercolour Rose

Today's card is using 5th Ave Floral and I've used the splash watercolour technique. There's lots of these cards on show at the moment and I really love the effect.
For my card I've used the Splitcoast Colours for this week: Baja Breeze, Ruby Red and Whisper White. I've stamped the rose in white ink onto some white cardstock. This cardstock is not Stampin'Up, but I use it for my watercoloured images because it doesn't soak up the water too quickly. I've sprinkled some white embossing powder over the image and then embossed with the heatgun.
Then I've sprayed a generous amount of water onto the cardstock, so you get pools of water on the rose petals. With my aqua painter, I've picked up colour from the ink pad lid and coloured in. Some people also use re-inkers, but seeing at I didn't have the right colours, I did it this way! Apply colour until you hare happy with the depth of colour. I also added some small touches of Pacific Point to high light.
Here's a close up of the rose - it's just gorgeous in real life and I love how the embossing give a shine to the rose.
I've finished off the card with a sentiment from Best Yet and used various punches to layer it.
Product used:
Stamps: 5th Ave Floral, Best Yet
Cardstock: Baja Breeze, Ruby Red, White (non-SU) DP Urban Oasis
Ink: Ruby Red, Whisper White
Accessories: White embossing powder, Aqua painter, S U punches, grograin white ribbon

Wednesday, 17 June 2009

Convention Projects

I have to admit, I've had my Convention projects sitting by my stamping table, just begging to be finished. So that's just what I did over these past few days. We got these four projects at Convention, but there was just not enough time to stamp them all up. I think I got half-way thru one, but then had to go along to the next talk about Leadership which I really didn't want to miss. Anyway, I had lots of fun finishing them off at home, so here they are:


This first card uses Cicle Circus and is called Thinking of You Card. I love they way we had to make flowers from the stamps. A clever idea.


This card uses Trendy Trees and is called Trendy Trees Thanks Card. This is one of those stamp sets that does work best if you use the Stamp-a-ma-jig, especially is you want it all straigh and in the correct position. Although it takes a little bit longer to make a card using this tool, the end result is def. worth it. I love this card!


This next project is the Trendy Trees Card Pack. This is four small note cards and a bag to hold them. For the bag, we used a plastic sleeve and then slipped a piece of Designer Paper in, the same size as the bag. Using the window punch, you then punch thru all the layers and add the chocolate ribbon to tie it up.
Each small card uses one of the trees and the sentiment. This would make a great workshop project or gift.


Then we have the Fold Out Scrapbook Page. This is what I started at Convention, but only got half way. It's a really nice idea and only uses one sheet of 12x12 as the base. You can basically decorate it as you wish. I have kept mine simple and used the embellishments that we received. The blank square needs to be filled in with some journalling.
So these are the fabulous projects we got to make and take home from Convention. I'm so glad I've finished them off and can now include them in my displays.

Tuesday, 16 June 2009

Patterns Designer Series Paper Share

I'm holding a paper share for the Patterns Designer Series Paper. These double sided papers are shown on page 153 of the catalogue and come in 8 fabulous colours:

Chocolate Chip
Pink Pirouette
Riding Hood Red
Pacific Point
Baja Breeze
Kiwi Kiss
So Saffron
Tangerine Tango

You will receive 48 squares (6"x 6") giving you every colour and design. This is a fabulous way to have all these lovely papers. The total is: $18.00 including postage to anywhere in Australia.
For more details please send me an email chuizeng@bigpond.net.au

Monday, 15 June 2009

Scrapbook Sketch challenge

It is time for another sketch challenge over at the ESAD group for Stampin'Up demo's. Mandy Schiller has provided this sketch as the challenge from Page Maps. Thanks for another great sketch Mandy - this was fun.

Here's my take on the sketch. I've used some cute photo's of my boys and I noticed I used red AGAIN. Maybe it's because Caden is wearing that adorable knitted jacket AGAIN.
So the base is 12x12 Riding Hood Red. I've used the swirly image from Baroque Motifs along the top of the page. Then I've added my photo's as per the sketch, the scallop edge and some paper piercing. I've cut out two circles with my Creative Memories cutter and stamped the same swirl image onto the green. Then I've made a letter 'C' and covered with some DP and tied off with a ribbon. I've also added the word cherish from the same stamp set. 'C' is for cherish. Lastly I've added some rub-on words on the photo's and some images in the corners at the top.

Another page done for my family scrapbook for 2009. It's coming along nicely and sketch challenges like this one are certainly motivating me to keep it up to date.

Sunday, 14 June 2009

Inkspiration Inspiration Challenge

Makeesha has her weekly challenge up and this one is an 'inspiration' challenge. I think I find these the most challenging and they certainly do make me think. I also find that I'm not always entirely pleased with the end result, but hey, it's all for fun and to see what you can create from a picture. So here is the inspiration picture - some gorgeous cushions.
And here is my creation. I didn't really plan this card before I started. I had seen these 'ribbon frames' (sorry, I cannot re-call exactly where I saw them) and knew I wanted to incorporate that into my card. But how? In the end I've tried to resemble a cushion!

I've started off with a Vanilla base for the card and then added some DP from Urban Garden. Then I've run a piece of Vanilla cardstock thru the Cuttlebug with the Leaves embossing folder.
For the cushion, I've cut a square of DP, then stamped the branch image from Cheep Talk in Whisper White ink and then embossed. I've made the ribbon frame from tafetta and pearls.
Then I've completed the card with a sentiment from Best Yet (hostess set) and used various punches to layer.
So there you have my creation. Thanks Keesh, for the challenge.

Product used:
Stamps: Cheep Talk, Best Yet
Cardstock: Very Vanilla, DP Urban Garden
Ink: Whisper White, Kiwi Kiss
Accessories: Pearls, Ribbon, Punches, Embossing powder - white, Cuttlebug.

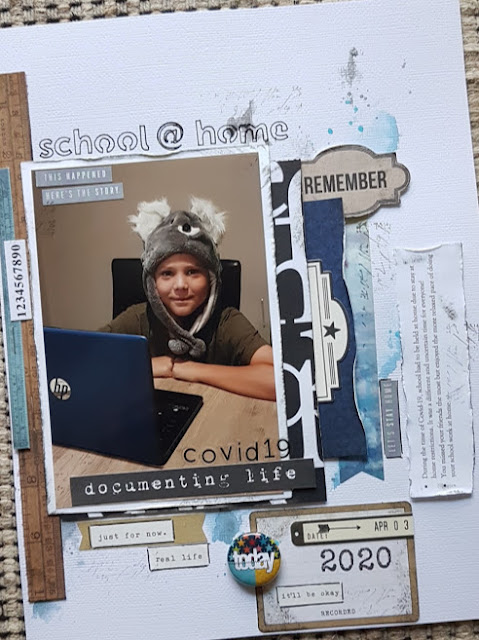
school @ home

Hello, I definitely wanted to record this little moment!  School @ home due to stay at home restrictions because of COVID-19.  It was certai...